

Honeywell Pro 3000 Installation Guide: Overview
This manual details the Honeywell Pro 3000’s installation, operation, and maintenance. It covers system setup, programming, troubleshooting, and advanced features for optimal performance.
Honeywell International is a diversified technology and manufacturing company with a rich history dating back to 1885. Originally an instrument production enterprise, Honeywell has evolved into a global leader across numerous sectors, including aerospace, building technologies, and performance materials.
The company’s commitment to innovation and quality is evident in its wide range of products, from aircraft engines and building control systems to automotive products and specialized materials. Honeywell’s dedication to creative technologies and strong leadership has solidified its position as a trusted brand worldwide.
Specifically, Honeywell provides solutions for home and building automation, including security systems like the Pro 3000.
Understanding the Pro 3000 System
The Honeywell Pro 3000 is a comprehensive security system designed for both residential and small commercial applications. It offers a robust set of features, including intrusion detection, fire alarm integration, and remote access capabilities; This system prioritizes user-friendliness alongside advanced security protocols.
Central to the Pro 3000’s functionality is its ability to be customized to meet specific security needs. Users can program zones, create unique user codes, and integrate the system with smart home devices for enhanced control and automation. The system’s architecture allows for scalability, accommodating additions as security requirements evolve.
Effective installation and configuration are crucial for maximizing the Pro 3000’s potential.
System Components
The Honeywell Pro 3000 system comprises several key components working in unison to provide complete security. These include the control panel, which serves as the system’s brain, managing all connected devices and communications. Wireless and hardwired door and window sensors detect unauthorized entry, triggering alarms.
Motion detectors cover larger areas, identifying movement within a designated space. Key fobs offer convenient arming and disarming capabilities. Smoke detectors, crucial for fire safety, integrate seamlessly with the system. A siren alerts occupants and deters intruders.
Optional components, like smart home integration modules, expand functionality. Proper understanding of each component is vital for successful installation.

Installation Process
Proper installation ensures optimal system performance. This phase involves a pre-installation checklist, wiring connections, mounting the control panel, and strategic sensor placement for comprehensive coverage.
Pre-Installation Checklist
Before commencing installation, a thorough checklist is crucial for a smooth process. First, verify all system components are present and undamaged, referencing the packing list. Confirm you have the necessary tools – screwdrivers, wire strippers, drill, and level.
Ensure a stable power supply is available near the control panel location, and that the area is dry and protected from extreme temperatures. Plan the sensor placement strategically, considering potential intrusion points and coverage areas. Review local building codes and regulations regarding alarm system installations.
Finally, familiarize yourself with the system’s wiring diagrams and programming manual. Having a clear understanding of these elements will significantly reduce installation time and potential errors, leading to a fully functional and reliable security system.
Wiring and Connections
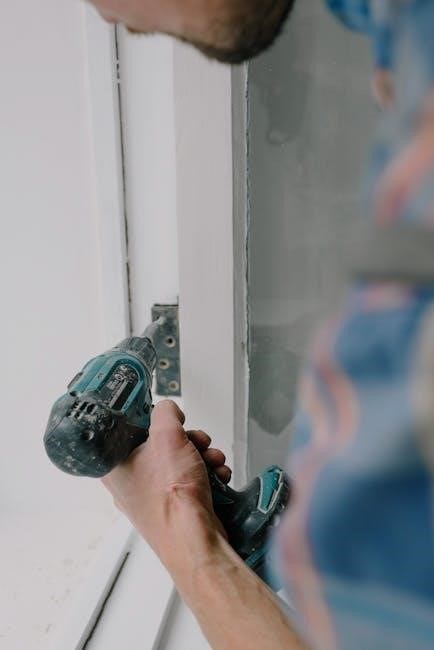
Proper wiring is fundamental to the Honeywell Pro 3000’s functionality. Begin by disconnecting power to the installation area. Carefully connect the control panel to the power source, adhering to the specified voltage requirements. Next, connect the communication bus wiring to each sensor, ensuring correct polarity and secure terminations.
Zone wiring requires meticulous attention; each zone corresponds to a specific area and must be wired accordingly. Utilize appropriate wire gauges and connectors for reliable signal transmission. Ground the system properly to prevent electrical interference and ensure safety.
Double-check all connections before restoring power, verifying that no wires are loose or improperly connected. Incorrect wiring can lead to false alarms or system malfunctions.

Mounting the Control Panel
Securely mounting the Honeywell Pro 3000 control panel is crucial for system stability. Select a central, easily accessible location, protected from extreme temperatures and moisture. Ensure the mounting surface is structurally sound and capable of supporting the panel’s weight.
Utilize the provided mounting hardware, carefully aligning the panel with the pre-drilled holes. Employ a level to guarantee a straight and stable installation. Securely fasten the panel with appropriate screws, avoiding over-tightening which could damage the enclosure.
Route wiring neatly through the designated cable entry points, preventing strain or damage. Verify the panel is firmly attached and does not wobble before proceeding.
Sensor Placement
Strategic sensor placement is vital for comprehensive Honeywell Pro 3000 security. Door and window sensors should be installed on all exterior access points, ensuring proper alignment for reliable detection. Motion detectors require unobstructed views of key areas, avoiding direct sunlight or heat sources.
Consider potential entry paths and blind spots when positioning sensors. Smoke detectors must be placed on each level of the home and near sleeping areas, following local fire codes. Glass break detectors should cover large windows or glass doors.

Test each sensor after installation to confirm functionality and adjust placement if necessary for optimal coverage.

System Configuration
Proper system configuration ensures optimal Honeywell Pro 3000 performance. This involves initial setup, zone programming, and creating unique user codes for personalized access.
Initial System Setup
The initial setup of your Honeywell Pro 3000 system is a crucial first step. Begin by powering on the control panel and verifying the date and time are correctly configured. Access the system menu, typically through a designated button sequence on the panel itself.
Next, establish a communication link between the control panel and the central monitoring station, if applicable. This often involves entering account details and testing the signal transmission. Ensure the system language is set to your preference.
Carefully review the default system settings and adjust them according to your specific security needs. This includes configuring entry/exit delays and alarm verification settings. A successful initial setup lays the foundation for a reliable and effective security system.
Programming Zones
Zone programming defines how the Honeywell Pro 3000 system responds to sensor activations. Each sensor, like a door or window contact, is assigned to a specific zone. Access the zone programming menu through the control panel interface, utilizing the master code.
For each zone, designate its type – instant, delay, or no entry delay – based on its location and function. Instant zones trigger an alarm immediately, while delay zones allow time to disarm the system upon entry. Configure zone descriptions for easy identification during alarm events.
Proper zone programming is vital for accurate alarm reporting and minimizing false alarms. Carefully consider the characteristics of each protected area when assigning zone types and settings.
User Code Creation
Creating unique user codes is crucial for personalized system access and security with the Honeywell Pro 3000. Access the user code programming section via the control panel, requiring the master code for authorization. Assign each user a distinct four-to-six digit code, avoiding easily guessable numbers like birthdays or addresses.
Define access levels for each user code – master, arm/disarm only, or limited access. Master codes grant full system control, while limited access codes restrict certain functions. Regularly review and update user codes, especially after personnel changes.
Document all assigned user codes securely, separate from the system itself. Proper user code management enhances system security and accountability.

Testing and Troubleshooting
Thoroughly test the Honeywell Pro 3000 after installation, performing a walk test. Address any error codes promptly, and resolve connectivity issues for reliable operation.
System Walk Test
Performing a comprehensive system walk test is crucial after installing the Honeywell Pro 3000. This verifies each sensor’s communication with the control panel and ensures the system responds correctly to activations. Begin by arming the system and then intentionally triggering each sensor – door contacts, motion detectors, and smoke detectors – one at a time.
Observe the control panel to confirm that each activation is registered and that the appropriate alarm signals are generated. Verify audible alarms are functioning correctly and that any connected monitoring services receive the alarm signals. Document any failures or inconsistencies encountered during the walk test. Address these issues immediately before considering the installation complete. A successful walk test confirms the system’s reliability and provides peace of mind.
Common Error Codes
The Honeywell Pro 3000 system utilizes error codes to diagnose potential issues. Understanding these codes is vital for efficient troubleshooting. A “COMM FAIL” error typically indicates a communication problem between the control panel and one or more sensors; check wiring and battery levels. “LOW BATTERY” signals a need for battery replacement in either the panel or a wireless device.
“TAMPER” alerts to a compromised sensor, potentially due to unauthorized access or removal. “ZONE FAULT” suggests a problem within a specific zone, requiring inspection of associated sensors. Refer to the full system manual for a complete list of error codes and their corresponding solutions. Regularly checking the event log can proactively identify and address minor issues before they escalate.
Troubleshooting Connectivity Issues
Connectivity problems with the Honeywell Pro 3000 can stem from several sources. First, verify the control panel’s power supply and ensure it’s securely connected. Check the communication wiring between the panel and all sensors, looking for loose connections or damage. For wireless devices, confirm sufficient battery levels and proximity to the panel – range limitations can cause intermittent signals.
If using a cellular or internet connection for remote access, verify the service is active and the panel has a strong signal. Rebooting the panel can often resolve temporary glitches. Consult the system manual for specific troubleshooting steps related to your communication method. A network test can pinpoint the source of the connectivity failure.

Advanced Features
The Pro 3000 offers remote access, smart home integration, and utilizes a distributed server architecture for enhanced control and monitoring capabilities.
Remote Access Setup
Enabling remote access for your Honeywell Pro 3000 system provides convenient control and monitoring from anywhere with an internet connection. This typically involves downloading the Honeywell Home mobile application, available on both iOS and Android platforms. During the setup process, you’ll need to create a Honeywell Home account and link it to your control panel using a unique registration code, often found on a sticker affixed to the panel itself.
Ensure your system is connected to a stable Wi-Fi network. The app allows you to arm or disarm the system, view sensor status, receive real-time alerts, and adjust system settings. Security is paramount; enable two-factor authentication for added protection against unauthorized access. Regularly update the app and system firmware to benefit from the latest security enhancements and features.
Integration with Smart Home Devices
The Honeywell Pro 3000 system offers seamless integration with a variety of popular smart home platforms, enhancing its functionality and convenience. Compatibility includes Amazon Alexa and Google Assistant, allowing voice control for arming, disarming, and checking system status. Linking these devices typically involves enabling the Honeywell Home skill or action within the respective smart home app.
Furthermore, the Pro 3000 can connect with Z-Wave enabled devices, expanding your automation possibilities. This enables control of smart lighting, locks, and thermostats directly through the security system interface. Explore IFTTT (If This Then That) integration for creating custom applets that trigger actions based on system events, like automatically turning on lights when the alarm disarms.
Honeywell Experion PKS System Structure
While the Pro 3000 is a standalone security system, understanding Honeywell’s broader control systems provides context. The Experion PKS (Process Knowledge System) utilizes a Distributed Server Architecture (DSA). This DSA integrates multiple process control systems, ideal for geographically dispersed operations with interconnected remote stations and a central control room;
Experion PKS focuses on complex industrial processes, differing significantly from residential security. It’s designed for large-scale operations requiring robust data management and control. Though not directly related to Pro 3000 installation, Honeywell’s expertise in distributed systems informs the reliability and scalability found across their product lines. The PKS system prioritizes process optimization and safety in industrial environments.

Maintenance and Support
Regular battery checks, cleaning, and inspections ensure optimal system performance; Honeywell provides extensive support resources, including manuals and a dedicated customer service team.
Battery Replacement
Maintaining the battery is crucial for uninterrupted security. The Honeywell Pro 3000 utilizes backup batteries to power the system during power outages. Regularly inspect the battery’s condition – typically annually – and replace it when needed. Low battery warnings will appear on the control panel, indicating replacement is imminent.
Use only Honeywell-approved replacement batteries to ensure compatibility and optimal performance. Incorrect batteries can damage the system or reduce its reliability. The replacement process is straightforward; consult the full installation manual for detailed, step-by-step instructions. Always dispose of old batteries responsibly, following local regulations for battery recycling. A functioning battery guarantees continued protection even during unforeseen power disruptions.
Cleaning and Inspection
Regular cleaning and inspection are vital for maintaining the Honeywell Pro 3000’s reliability. Dust and debris can interfere with sensor functionality and panel operation. Use a soft, dry cloth to gently wipe down the control panel and all sensors. Avoid using harsh chemicals or abrasive cleaners, as these can damage the components.
Inspect wiring connections annually to ensure they remain secure and free from corrosion. Verify that all sensors are properly mounted and haven’t been obstructed. Test the system periodically to confirm all components are functioning correctly. A proactive approach to cleaning and inspection will help identify potential issues before they escalate, ensuring long-term system performance and peace of mind.
Honeywell Support Resources
Honeywell provides extensive support resources for the Pro 3000 system. Their official website offers a comprehensive knowledge base, including FAQs, troubleshooting guides, and downloadable manuals. A dedicated support team is available via phone and email to assist with technical inquiries and installation challenges.
Authorized Honeywell dealers can also provide professional installation, maintenance, and repair services. Online forums and communities dedicated to home security systems can offer peer-to-peer support and valuable insights. Remember to have your system’s model number and serial number readily available when contacting support for faster assistance. Utilizing these resources ensures a smooth and efficient experience with your Honeywell Pro 3000 system.

Safety Considerations
Prioritize safety during installation. Integrate fire alarms and understand smoke detector functionality; general precautions are crucial for a secure and reliable Honeywell Pro 3000 system.
Fire Alarm Integration
Seamlessly integrating the Honeywell Pro 3000 with existing fire alarm systems is paramount for comprehensive safety. This integration allows for a unified response to fire emergencies, ensuring swift notification and coordinated action. The Pro 3000 can receive signals from fire alarm control panels, automatically triggering pre-programmed responses such as door unlocking, lighting activation, and communication alerts.
Proper wiring and configuration are essential for reliable fire alarm integration. Refer to the system’s wiring diagrams and programming manuals for detailed instructions. Ensure compatibility between the Pro 3000 and the fire alarm system’s communication protocols. Regular testing of the integrated system is crucial to verify functionality and maintain a high level of protection. Smoke detectors, as a vital component, provide early fire detection, minimizing potential damage and ensuring occupant safety.
Smoke Detector Functionality
Honeywell Pro 3000 systems rely on strategically placed smoke detectors for early fire detection. These detectors utilize photoelectric or ionization sensing technologies to identify airborne particles indicative of combustion. Upon detecting smoke, the detector sends a signal to the control panel, initiating a pre-programmed alarm sequence.
Proper placement is critical; install detectors in hallways, bedrooms, and living areas, avoiding kitchens and bathrooms to minimize false alarms. Regular testing – monthly is recommended – ensures detectors are operational. The system differentiates between smoke detector alarms and other sensor triggers, allowing for tailored responses. Remember, smoke detectors aren’t preventative, but crucial for minimizing fire damage and maximizing occupant safety, especially during nighttime events.
General Safety Precautions
Prior to commencing any Honeywell Pro 3000 installation, disconnect power to the relevant circuit(s) at the breaker panel. Always verify the power is off using a non-contact voltage tester. Wear appropriate personal protective equipment (PPE), including safety glasses and gloves, during wiring and mounting procedures.
Exercise caution when working with ladders and ensure stable footing. Avoid running wires through areas where they could be damaged or create a tripping hazard. Never attempt repairs beyond your skill level; consult a qualified technician for complex issues. Familiarize yourself with local building codes and regulations regarding security system installations. Proper grounding is essential to prevent electrical shock and ensure system reliability.