
Welcome! This manual guides you through operating your Hamilton Beach juicer, ensuring fresh, healthy juices․ Explore features detailed in included documentation and enjoy vibrant blends․
What’s Included in the Box
Your Hamilton Beach juicer package should contain the following components: Carefully unpack the box and verify that all listed items are present․ You’ll find the motor base, providing the power for juicing operations․ The juicing bowl collects the extracted juice, while the pulp container neatly separates the fiber․
Essential for the juicing process are the juicing auger and blade, responsible for crushing and extracting juice from produce․ A feed chute guides fruits and vegetables towards the auger․ Additionally, you should receive this user manual, offering guidance on setup, operation, cleaning, and troubleshooting․ Retain this manual for future reference to maximize your juicing experience!
Safety Precautions
Prioritize safety during juicer operation! Always unplug the juicer before assembly, disassembly, or cleaning․ Never operate the juicer if the power cord or plug is damaged․ Keep hands and utensils away from the moving parts during operation to prevent injury․
Supervise children closely when the juicer is in use․ Do not attempt to juice hard or frozen items, as this could damage the appliance․ Ensure the juicer is placed on a stable, level surface before use․ Never operate the juicer continuously for extended periods; allow it to cool down between uses․ Read all instructions carefully before operating․

Understanding the Juicer Components
Familiarize yourself! Your Hamilton Beach juicer features a bowl, auger, blade, motor base, and feed chute – each crucial for efficient juice extraction․
Juicing Bowl and Pulp Container
The Juicing Bowl is where the magic happens, receiving pulp-free juice as fruits and vegetables are processed․ Ensure it’s securely locked onto the motor base before operation․ Regularly inspect for cracks or damage․
The Pulp Container efficiently collects fibrous residue from juicing․ Empty it frequently during use to maintain optimal performance and prevent clogging․ A full container can hinder juice flow․
Both components are designed for easy disassembly and cleaning, often being dishwasher safe (check your model’s specific instructions)․ Proper maintenance of these parts ensures longevity and hygienic juice preparation․ Always handle with care to avoid breakage․
Juicing Auger and Blade
The Juicing Auger, often a stainless-steel screw, powerfully crushes fruits and vegetables against the filter․ It’s the core component driving the juice extraction process․ Inspect regularly for wear or dulling, as this impacts juicing efficiency․
The Blade, working in conjunction with the auger, initially breaks down produce․ Exercise extreme caution when handling the blade, as it is very sharp! Never attempt to disassemble or clean the blade without proper safety measures․
These components require thorough cleaning after each use to prevent buildup and maintain hygiene․ Avoid abrasive cleaners that could damage the surfaces․ Proper care extends their lifespan and ensures optimal juice quality․
Motor Base and Feed Chute
The Motor Base houses the powerful motor driving the juicing process․ Ensure it remains dry and clean; never immerse it in water․ Regularly check the power cord for damage and avoid using it if frayed․ Proper ventilation around the base is crucial to prevent overheating during operation․
The Feed Chute is where you introduce fruits and vegetables․ Use the included pusher to gently guide produce through, avoiding excessive force․ Never insert hands or foreign objects into the chute while the juicer is running!
Consistent cleaning of both components is vital for longevity and performance․ A stable, level surface is essential for safe operation of the motor base․

Setting Up Your Juicer
Assembly is key! Securely connect all components on a stable surface before operation․ Refer to diagrams for correct placement, ensuring safe and efficient juicing․
Assembling the Juicer
Begin by placing the motor base on your countertop․ Next, carefully position the juicing bowl onto the motor base, ensuring it locks securely into place with a gentle twist․ Following this, insert the juicing auger and blade assembly into the juicing bowl, aligning it correctly for optimal performance․
Attach the pulp container to the rear of the juicing bowl, providing a designated space for collected pulp․ Finally, secure the feed chute onto the juicing bowl, creating the entry point for fruits and vegetables․ Double-check all connections to guarantee a stable and safe assembly before operation․ Proper assembly is crucial for efficient juicing and preventing potential issues․
Placing the Juicer on a Stable Surface
To ensure safe and efficient operation, always place your Hamilton Beach juicer on a flat, stable, and non-slip surface․ Avoid positioning it near the edge of countertops or tables where it could potentially fall․ A level surface prevents wobbling during operation, minimizing spills and ensuring consistent juicing performance․
Verify the surface can adequately support the juicer’s weight, especially when filled with fruits and vegetables․ Keep the area around the juicer clear of obstructions and moisture․ This precaution prevents accidental contact with electrical components and maintains a safe juicing environment․ Stability is paramount for a worry-free experience․
Juicing with Your Hamilton Beach Juicer
Prepare fresh fruits and vegetables, then follow the step-by-step instructions for optimal juice extraction․ Enjoy delicious, homemade beverages easily!
Preparing Fruits and Vegetables
Optimal juicing begins with proper preparation․ Wash all produce thoroughly under cool water to remove any dirt or residue․ For harder fruits and vegetables like carrots or apples, consider cutting them into smaller pieces that will easily fit into the feed chute – approximately 1-2 inch chunks are ideal․
Citrus fruits, while often juiced separately, can also be processed through the main juicer if peeled․ Remove any thick rinds or peels from other fruits like pineapples or melons․ Remove pits and large seeds from stone fruits like peaches or plums․ Leafy greens, such as spinach or kale, can be added directly, but may require alternating with harder produce for efficient extraction․
Remember to remove inedible parts, ensuring a smoother juice and preventing damage to your Hamilton Beach juicer․
Operating the Juicer ⎯ Step-by-Step
Begin by ensuring the juicer is correctly assembled and placed on a stable surface․ Plug the power cord into a grounded outlet․ Turn the juicer on; typically, there’s a low and high speed setting – start with low for softer fruits․ Gently feed prepared fruits and vegetables into the feed chute, using the pusher to apply even pressure․
Avoid forcing ingredients down, allowing the juicer to process them naturally․ Observe the juice collecting in the designated container and the pulp accumulating in the pulp container․ If the juicer struggles, alternate soft and hard produce․ Once finished, turn the juicer off before disassembling․
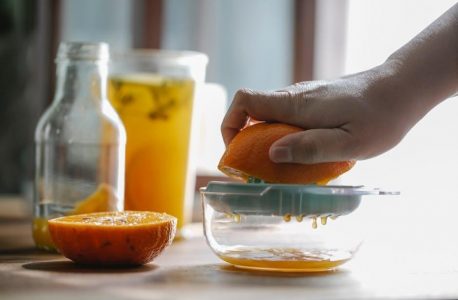
Juicing Citrus Fruits
For optimal citrus juicing, peel the fruit to avoid clogging the juicer and prevent a bitter taste in your juice․ Cut the peeled citrus into segments that fit comfortably into the feed chute․ Utilize the pusher gently to guide the segments down, applying consistent, moderate pressure․
Due to the higher water content in citrus, expect a slightly wetter pulp compared to other fruits and vegetables․ Monitor the juice and pulp containers frequently․ Some models may have a specific citrus attachment; consult your manual․ Remember to turn off and unplug the juicer before cleaning after citrus juicing․

Cleaning and Maintenance
Regular cleaning ensures optimal performance and longevity․ Disassemble components after each use, washing dishwasher-safe parts for convenience and hygiene․
Disassembling the Juicer for Cleaning
Before cleaning, always unplug your Hamilton Beach juicer from the power outlet․ Begin by removing the juicing bowl and pulp container․ Gently lift and separate these components from the motor base․ Next, disassemble the juicing auger and blade assembly; typically, this involves unscrewing or lifting to release it․
Carefully detach any additional parts, like the feed chute cap․ Ensure you have a stable surface to place the disassembled components․ Refer to the diagrams in this manual for visual guidance if needed․ Proper disassembly simplifies the cleaning process and prevents damage to the juicer’s delicate parts․ Remember to handle the blade with caution!
Washing the Components (Dishwasher Safe Parts)
Many Hamilton Beach juicer parts are conveniently dishwasher safe! The juicing bowl, pulp container, feed chute, and juicing auger can typically be washed on the top rack of your dishwasher․ However, always consult the specific instructions included with your model to confirm compatibility․
For a thorough clean, remove any large pulp pieces before placing the components in the dishwasher․ If handwashing, use warm, soapy water and a soft sponge․ Avoid abrasive cleaners, as they can damage the plastic․ Rinse thoroughly and allow all parts to air dry completely before reassembling the juicer․
Cleaning the Motor Base
The motor base requires careful cleaning, but never immerse it in water! To clean, simply wipe down the exterior with a damp cloth․ Ensure the juicer is unplugged before cleaning․ For stubborn residue, use a mild dish soap solution, but avoid getting any liquid inside the base․
Pay attention to the area around the feed chute, as pulp can accumulate there․ A soft brush can help remove any stuck-on particles․ Thoroughly dry the motor base with a clean cloth before reassembling the juicer․ Proper cleaning extends the life of your appliance and ensures optimal performance․
Troubleshooting Common Issues
Facing problems? Check power connections, pulp levels, and overheating․ Refer to this section for solutions to typical juicer malfunctions and optimal usage․
Juicer Not Turning On
Problem: Your Hamilton Beach juicer fails to power on, preventing juice extraction․ First, ensure the unit is securely plugged into a functioning electrical outlet․ Test the outlet with another device to confirm power delivery․
Check the safety interlock mechanism; the juicer won’t operate if components aren’t correctly assembled․ Verify the juicing bowl and lid are firmly locked into place․ A reset button may be present on the motor base – locate and press it if applicable․
Inspect the power cord for any visible damage, such as cuts or fraying․ If damage is detected, discontinue use immediately․ If these steps don’t resolve the issue, consult a qualified technician for assistance, or contact Hamilton Beach customer support․
Pulp is Too Wet
Concern: Experiencing excessively wet pulp during juicing indicates insufficient juice extraction․ Ensure you’re feeding fruits and vegetables slowly and steadily into the feed chute, allowing the auger to effectively process the produce․ Avoid overloading the juicer, as this can reduce extraction efficiency․
Check the filter screen for any blockages or damage․ A clogged filter restricts juice flow, resulting in wetter pulp․ Consider adjusting the pressure applied when pushing produce through the chute – excessive force isn’t always beneficial․
For certain fruits and vegetables, like citrus, a wetter pulp is normal․ If the issue persists, ensure proper assembly and consider juicing harder produce first․
Juicer Overheating
If your Hamilton Beach juicer overheats, immediately unplug it from the power outlet․ Continuous operation for extended periods, especially with dense or fibrous produce, can cause the motor to overheat as a safety precaution․ Allow the juicer to cool down completely – approximately 30-60 minutes – before attempting to restart it․
Avoid juicing large quantities without allowing the motor to rest․ Ensure the juicer isn’t blocked with pulp, as this increases strain on the motor․ Proper ventilation is crucial; do not operate the juicer in a confined space․
If overheating persists, contact customer support․

Technical Specifications
This Hamilton Beach juicer operates on standard household voltage, frequency, and wattage – details are listed on the appliance’s base for safe operation․
Voltage, Frequency, and Wattage
Understanding the electrical requirements of your Hamilton Beach juicer is crucial for safe and optimal performance․ Typically, these juicers are designed for use with standard household electrical systems․
The voltage is generally 120V for North American models, while frequency operates at 60Hz․ European and other international models may require different voltage specifications – always check the label․
Wattage indicates the power consumption during operation; this varies depending on the model, but commonly ranges between 500 to 800 watts․ Refer to the specific rating plate located on the bottom of your juicer’s motor base for precise details․ Using the correct voltage and wattage ensures efficient juicing and prevents potential damage to the appliance․

Recipes for Your Fresh Juice
Unlock delicious possibilities! Explore vibrant juice recipes, starting with a simple apple blend or a zesty carrot and ginger combination for optimal health․
Basic Apple Juice Recipe
Yields: Approximately 16 ounces (2 cups) of fresh apple juice․
Prep time: 5 minutes
Ingredients: 4-5 medium-sized apples (such as Gala, Fuji, or Honeycrisp – remove any stickers!)․ Consider using a variety for a more complex flavor profile․ Organic apples are recommended when possible․
Instructions:
- Wash the apples thoroughly under cold running water․
- Cut the apples into quarters or smaller pieces that will easily fit into the feed chute of your Hamilton Beach juicer․ Removing the core is optional, as many juicers can handle it․
- Turn on your juicer and slowly feed the apple pieces into the feed chute, using gentle and even pressure․
- Allow the juicer to extract the juice, separating it from the pulp․
- Enjoy your freshly made apple juice immediately for the best flavor and nutritional value!
Tip: For a sweeter juice, use naturally sweeter apple varieties․ A squeeze of lemon juice can help prevent browning․
Carrot and Ginger Juice Blend
Yields: Roughly 12 ounces (1․5 cups) of invigorating juice․
Prep time: 8 minutes
Ingredients: 6-8 medium carrots (peeled), a 1-inch piece of fresh ginger (peeled), and optionally, ½ a green apple for sweetness․ Adjust ginger amount to your spice preference․
Instructions:
- Thoroughly wash and peel the carrots․ Peel the ginger root․
- Chop the carrots and ginger into pieces suitable for your Hamilton Beach juicer’s feed chute․
- If using, core and chop the apple․
- Turn on the juicer and slowly feed the ingredients into the chute, alternating between carrots, ginger, and apple․
- Collect the juice and enjoy immediately for maximum freshness and nutrient retention․
Tip: Ginger adds a powerful kick! Start with a smaller piece and add more to taste․

Warranty Information
Hamilton Beach Warranty: Your Hamilton Beach juicer is warranted against defects in materials and workmanship for a period of one (1) year from the date of original purchase․ This warranty covers normal household use․
What is Covered: We will, at our discretion, repair or replace any defective parts, or the entire unit, free of charge․ Proof of purchase is required․
What is Not Covered: Damage caused by misuse, abuse, accident, alteration, or commercial use voids the warranty․ Normal wear and tear is also excluded․
To Obtain Warranty Service: Contact Hamilton Beach customer service with your model number and date of purchase for assistance․ See our website for full details and claim procedures․