

Sakrete Concrete Mix Instructions: A Comprehensive Guide
Sakrete offers versatile solutions‚ from tile grouting requiring a thick consistency to high-strength concrete mixes and rapid-setting anchoring epoxies for diverse projects.

This guide details Sakrete’s applications‚ advantages‚ packaging‚ yields‚ and technical data‚ ensuring successful and durable results for every construction endeavor.
Understanding Sakrete Concrete Mix Types
Sakrete offers a diverse portfolio of concrete mixes‚ each engineered for specific applications and performance requirements. Recognizing these distinctions is crucial for project success. Beyond the standard concrete mix‚ Sakrete provides specialized formulations designed to address unique construction challenges.
For instance‚ Sakrete’s Rapid Setting Anchoring Epoxy‚ packaged in 8.6 oz containers‚ is a two-component system ideal for securely anchoring bolts or metal objects. This isn’t a general concrete mix‚ but a targeted adhesive solution. Conversely‚ standard Sakrete concrete mixes cater to broader applications like footings‚ slabs‚ and repairs.
Understanding yield calculations is also key. Different Sakrete products offer varying yields based on weight and water added. Carefully reviewing the technical data sheet for each mix type will reveal precise volume estimations. Furthermore‚ some Sakrete mixes are pre-blended for convenience‚ while others require on-site mixing with aggregates. Choosing the appropriate type streamlines the process and ensures optimal results‚ whether it’s grouting tile joints with a thick consistency or constructing substantial concrete structures.
Sakrete vs. Standard Concrete: Key Differences
While both Sakrete and standard concrete result in hardened cementitious materials‚ key distinctions impact usability and performance. Standard concrete typically involves sourcing cement‚ aggregates (sand and gravel)‚ and water separately‚ requiring on-site proportioning and mixing. This demands experience to achieve consistent quality.
Sakrete‚ conversely‚ is a pre-blended product‚ simplifying the process. It combines cement and aggregates in a pre-determined ratio‚ minimizing the risk of improper mixing. This convenience is particularly beneficial for smaller projects or users lacking concrete mixing expertise. However‚ this pre-blending can sometimes limit customization options available with standard concrete.
Furthermore‚ Sakrete often includes additives to enhance specific properties‚ such as rapid setting times (as seen in the anchoring epoxy) or improved workability. Standard concrete mixes may require separate additives to achieve similar results. Yield calculations also differ; Sakrete packaging clearly indicates expected volumes per bag‚ while standard concrete requires calculations based on individual component quantities. Ultimately‚ Sakrete prioritizes convenience and consistency‚ while standard concrete offers greater flexibility for larger‚ specialized applications.
Tools and Materials Needed for Sakrete Mixing
Successfully mixing Sakrete requires a few essential tools and materials. First‚ you’ll need the Sakrete concrete mix itself‚ selecting the appropriate type for your project – from general-purpose mixes to specialized anchoring epoxies. A sturdy mixing container is crucial; options range from wheelbarrows for larger batches to plastic buckets for smaller ones.
For hand mixing‚ a shovel or hoe is indispensable for thoroughly combining the dry ingredients and water. If using a mechanical mixer‚ ensure it’s appropriately sized for the batch volume. A measuring container (bucket or pitcher) is vital for accurate water proportioning‚ a critical factor for achieving the correct consistency.
Personal protective equipment (PPE) is non-negotiable: wear work gloves to protect your hands‚ safety glasses to shield your eyes‚ and a dust mask to avoid inhaling cement particles. Additional helpful tools include a trowel for smoothing and finishing‚ and a level to ensure proper setting. Finally‚ have a water source readily available‚ and consider a work surface covered with a tarp for easy cleanup.
Safety Precautions When Working with Sakrete

Working with Sakrete demands strict adherence to safety protocols. Dry cement powder is a significant irritant; always wear a dust mask to prevent inhalation‚ which can cause respiratory issues. Protect your eyes with safety glasses or goggles – cement dust and splashes can cause severe irritation or damage.
Skin contact should be avoided. Wear long sleeves‚ pants‚ and work gloves to shield your skin from the abrasive and potentially caustic nature of the mix. If contact occurs‚ rinse the affected area immediately with copious amounts of water. Sakrete mixtures can be heavy‚ so lift with your legs‚ not your back‚ to prevent strain or injury;
Ensure adequate ventilation when mixing indoors or in enclosed spaces. Avoid creating excessive dust. Be mindful of your surroundings and keep children and pets away from the work area. When using mechanical mixers‚ follow the manufacturer’s safety guidelines. Always read and understand the product’s Material Safety Data Sheet (MSDS) before beginning any project.
Step-by-Step Mixing Instructions – Small Batch
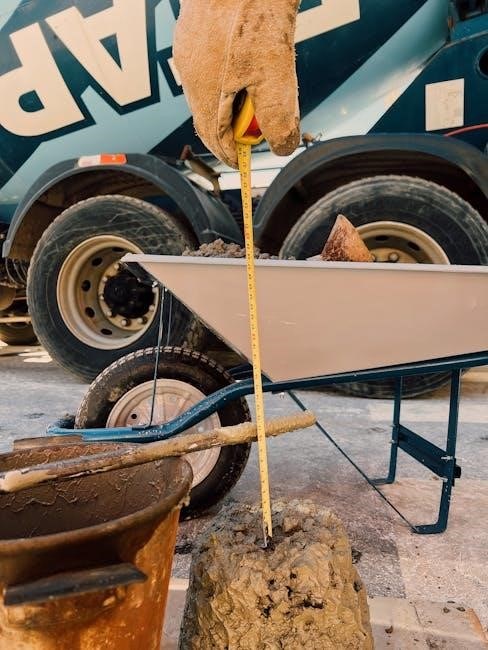
For small Sakrete projects‚ begin by emptying one 80lb bag into a wheelbarrow or mixing container. Gradually add water‚ starting with approximately 2.5 to 3 quarts. Use a sturdy shovel or hoe to thoroughly combine the powder and water‚ ensuring no dry pockets remain.
Mix vigorously for 3-5 minutes‚ continually breaking up clumps and folding the mixture over itself. The goal is a uniform consistency – a thick‚ workable paste. Avoid adding too much water initially; it’s easier to add more than to correct an overly wet mix.
Continue mixing until the Sakrete achieves a smooth‚ consistent texture‚ free of lumps. Check for proper consistency by drawing a line through the mix with the shovel; the line should hold its shape. If it slumps immediately‚ add a small amount of dry Sakrete and remix. This small batch method is ideal for repairs or smaller applications.
Step-by-Step Mixing Instructions – Large Batch
When tackling larger Sakrete projects‚ a concrete mixer is highly recommended. Begin by adding approximately half the required water into the mixer drum. Then‚ slowly pour in the Sakrete‚ allowing it to mix with the water as it enters. Continue adding Sakrete and water alternately‚ maintaining a consistent flow.
For a standard 80lb bag‚ typically 5-7 quarts of water are needed‚ but adjust based on desired consistency. Once all the Sakrete and water are added‚ let the mixer run for 3-5 minutes‚ ensuring thorough blending. Regularly scrape down the sides of the drum with a shovel to incorporate any unmixed material.
Check the consistency frequently; it should be a uniform‚ workable paste. Add small amounts of water or dry Sakrete as needed to achieve the correct texture. A properly mixed large batch will be smooth and consistent throughout‚ ready for pouring and finishing.
Water Ratio: The Critical Factor for Sakrete
The water ratio is arguably the most crucial aspect of successful Sakrete mixing. Too little water results in a dry‚ unworkable mix‚ leading to weak concrete and potential cracking. Conversely‚ excessive water weakens the concrete by creating voids and reducing its overall strength.
Sakrete packaging provides a general guideline – typically 5-7 quarts of water per 80lb bag – but this is a starting point. Environmental conditions‚ such as temperature and humidity‚ significantly impact water demand. Hot‚ dry weather necessitates more water‚ while cooler‚ humid conditions require less.
Always add water gradually‚ mixing thoroughly after each addition. Observe the mixture’s consistency; it should resemble a thick‚ workable paste. Avoid adding “too much” water‚ as it cannot be effectively removed. Precise water control ensures optimal hydration‚ strength development‚ and durability of your Sakrete project.
Mixing Methods: Hand Mixing vs. Using a Mixer
Sakrete can be effectively mixed using either manual hand mixing or a mechanical mixer‚ each suited to different project scales. For small batches‚ hand mixing is feasible‚ utilizing a wheelbarrow‚ shovel‚ and consistent effort. Ensure a clean‚ hard surface for mixing‚ gradually adding water while thoroughly combining the dry ingredients.
However‚ for larger projects‚ a mechanical mixer is highly recommended. Concrete mixers significantly reduce labor and ensure a more homogenous‚ consistent mix. They efficiently blend the ingredients‚ minimizing the risk of dry pockets or uneven hydration.
When using a mixer‚ follow the manufacturer’s instructions. Typically‚ add a portion of the water‚ then the Sakrete mix‚ and gradually add the remaining water while the mixer operates. Avoid overloading the mixer‚ and always ensure it’s properly grounded for safety. A mixer delivers superior results‚ especially for substantial concrete volumes.
Achieving the Right Consistency: Visual Cues

Determining the correct Sakrete consistency is crucial for optimal strength and workability. Avoid simply adding water until it “looks right”; rely on observable characteristics. A properly mixed batch should resemble a thick‚ uniform paste – not too soupy‚ nor overly dry and crumbly.
Look for a mixture that holds its shape when molded‚ yet is easily workable. When you draw a line across the surface with a shovel or trowel‚ the line should hold its form briefly before slowly leveling out. If the mix collapses immediately‚ it’s likely too wet.
Conversely‚ if the mix resists being shaped and appears powdery‚ it needs more water. Remember‚ adding too much water weakens the final product. Observe the sheen; a properly hydrated mix will have a slight sheen. Consistent visual assessment‚ combined with adherence to recommended water ratios‚ guarantees a successful outcome.
Troubleshooting Common Mixing Problems
Even with careful measurement‚ mixing issues can arise. A common problem is a dry‚ crumbly mix – this almost always indicates insufficient water. Add water gradually‚ a little at a time‚ and remix thoroughly until the desired consistency is achieved. Avoid a sudden deluge‚ as this can weaken the concrete.
Conversely‚ a soupy or excessively wet mix compromises strength. Unfortunately‚ correcting this is difficult. Avoid adding more dry Sakrete‚ as it won’t fully integrate. The best course is often to discard the batch and start anew‚ meticulously following the water ratio guidelines.
Lumps can form if the powder isn’t adequately dispersed. Prolonged mixing‚ or pre-mixing the dry ingredients before adding water‚ can resolve this. If using a mixer‚ ensure it’s operating at the correct speed. Consistent observation and prompt corrective action are key to avoiding costly mistakes.

Pouring and Finishing Sakrete: Best Practices
Once mixed‚ pour Sakrete continuously into the prepared form‚ avoiding segregation of the aggregate. Use a shovel or rake to distribute it evenly‚ ensuring it reaches all corners and voids. For thicker pours‚ consider using a concrete vibrator to consolidate the mix and eliminate air pockets‚ enhancing strength and durability.
Immediately after pouring‚ begin the finishing process. Level the surface with a screed board‚ removing excess material. For a smooth finish‚ use a wood or magnesium float‚ working in overlapping arcs. Allow slight drying before applying a steel trowel for a polished surface.
Proper timing is crucial. Don’t delay pouring after mixing‚ as the concrete will begin to set. Avoid overworking the surface‚ as this can weaken it. Consider the ambient temperature; warmer conditions accelerate setting‚ requiring faster work. Careful attention to these details ensures a professional and long-lasting result.
Curing Sakrete: Ensuring Strength and Durability
Sakrete’s strength develops over time through a process called curing. This involves maintaining adequate moisture levels to allow proper hydration of the cement. Begin curing immediately after finishing‚ as moisture loss significantly impacts final strength.
Several methods can be employed. Regularly mist the surface with water for several days‚ especially in hot or windy conditions. Alternatively‚ cover the Sakrete with plastic sheeting to trap moisture. Wet burlap sacks are also effective‚ ensuring they remain consistently damp. Ponding with water is suitable for flat surfaces.
The duration of curing depends on the ambient temperature and humidity. Generally‚ a minimum of three to seven days is recommended‚ but longer curing periods yield greater strength and durability. Proper curing prevents cracking‚ scaling‚ and dusting‚ maximizing the lifespan of your project. Neglecting this step compromises the concrete’s integrity.
Sakrete Applications: Common Projects
Sakrete’s versatility makes it ideal for a wide array of projects‚ both large and small. A frequently cited application is the grouting of tile joints‚ requiring a specifically mixed‚ thick consistency for optimal adhesion and water resistance. Beyond tiling‚ Sakrete excels in foundational work.
Common uses include setting posts for fences‚ mailboxes‚ and signs‚ providing robust support against weathering and stress. Repairing cracked concrete surfaces‚ such as patios‚ walkways‚ and driveways‚ is another popular application‚ restoring structural integrity and aesthetics. Creating stepping stones and small pads for outdoor furniture is easily achievable.
Furthermore‚ Sakrete is suitable for anchoring bolts or metal objects‚ particularly when utilizing the Rapid Setting Anchoring Epoxy. From simple DIY repairs to more complex construction tasks‚ Sakrete offers a reliable and cost-effective solution. Always select the appropriate Sakrete mix for the intended application.
Sakrete Rapid Setting Anchoring Epoxy: Specific Instructions
Sakrete Rapid Setting Anchoring Epoxy is a two-component system designed for securely anchoring bolts‚ rebar‚ or metal objects into concrete. This epoxy distinguishes itself with its fast curing time‚ providing a strong bond quickly. Preparation is key: ensure the hole is clean and free of dust and debris for optimal adhesion.
The product comes in a dual cartridge; activate by removing the cap and attaching the mixing nozzle. Dispense a small amount to ensure proper mixing of the resin and hardener. Thoroughly fill the hole‚ leaving space for the anchor. Insert the anchor and apply slight pressure.
Avoid disturbing the anchor during the initial set‚ which typically takes several minutes. Full cure and maximum strength are achieved within 24 hours. Always consult the product packaging for specific temperature and humidity guidelines. Proper ventilation is recommended during application. This epoxy is ideal for projects requiring immediate load-bearing capacity.
Sakrete Technical Data and Yield Calculations
Sakrete provides comprehensive technical data to ensure accurate project planning and execution. Understanding yield calculations is crucial for estimating material needs and minimizing waste; Yield varies based on the specific Sakrete product and aggregate size used.

Generally‚ a standard 80lb bag of Sakrete concrete mix yields approximately 0.60 cubic feet when mixed with the recommended amount of water. This translates to roughly 1.25 cubic feet of cured concrete‚ accounting for expansion during hydration. For anchoring epoxy‚ a dual cartridge typically yields enough material to fill several holes‚ depending on their diameter and depth.
Refer to the product packaging for precise yield information and detailed technical specifications‚ including compressive strength‚ setting time‚ and working time. Sakrete’s website also offers calculators and resources to assist with yield estimations. Accurate calculations contribute to cost-effectiveness and project success.