

The Canon AE-1, released in 1976, revolutionized photography with its accessibility and advanced features. Its programmed AE modes and user-friendly design made it a popular choice, documented extensively in its instruction manual.
Historical Context of the Canon AE-1
Launched in 1976, the Canon AE-1 arrived during a pivotal shift in the photographic landscape. It democratized SLR photography, offering features previously found in more expensive models. The accompanying instruction manual reflected this, aiming for clarity for both beginners and experienced users.
Facing competition from Nikon and Minolta, Canon needed a camera to capture market share. The AE-1’s success stemmed from its blend of innovation and affordability, detailed within its comprehensive guide.
Key Features and Innovations
The Canon AE-1’s instruction manual highlights its groundbreaking programmed AE mode, simplifying exposure settings. Shutter-speed priority AE and aperture-priority AE offered creative control, while a manual override provided full flexibility.
Its electronic shutter and microcomputer control were innovative for the time. The manual details these features, alongside explanations of the built-in light meter and compatibility with Canon FD lenses, solidifying its place in photographic history.
Understanding the Camera Body
The Canon AE-1’s instruction manual details a thoughtfully designed body, prioritizing ease of use with clearly labeled controls and a comfortable grip for stable shooting.
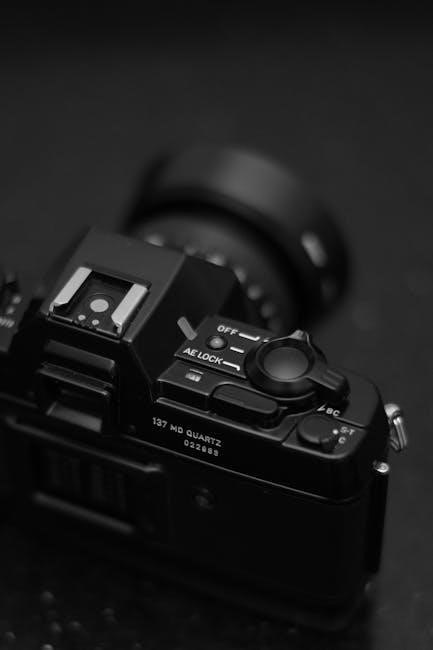
Layout of Controls and Dials
The Canon AE-1 instruction manual meticulously illustrates the camera’s control layout. Key dials for shutter speed and aperture are prominently positioned for quick adjustments. The mode selector switch, crucial for choosing between programmed AE, shutter-priority, aperture-priority, and manual modes, is easily accessible. Film speed setting and exposure compensation dials are also clearly marked. The manual emphasizes understanding each control’s function for optimal photographic results, ensuring users can confidently navigate the camera’s features.
Viewfinder Information and Usage
The Canon AE-1’s instruction manual details the comprehensive viewfinder display. It features a central split-image focusing aid for precise sharpness, alongside microprism collar for easier focusing. The manual explains how to interpret the LED indicators displaying exposure levels – underexposure, correct exposure, and overexposure. Understanding these indicators, as outlined in the manual, is vital for achieving properly exposed photographs, maximizing the camera’s automatic capabilities.
Film Loading and Unloading Procedures
The Canon AE-1 instruction manual provides a step-by-step guide to film loading. It details opening the back cover, correctly seating the film canister and take-up spool, and advancing the film until the rewind knob rotates. The manual also clearly illustrates the unloading process, ensuring proper film retrieval. Following these procedures, as described, prevents damage to the film or camera mechanism.
Exposure Modes Explained
The Canon AE-1 manual details programmed AE, shutter-speed priority, and aperture-priority modes. It clarifies how each mode functions, offering photographers versatile control over exposure settings.
Programmed AE Mode
The Canon AE-1’s Programmed AE mode, as explained in the instruction manual, automatically selects both the optimal shutter speed and aperture for a given lighting situation. This simplifies photography for beginners, ensuring well-exposed images without manual adjustments. The camera analyzes the scene via its light meter and sets these values, prioritizing a sharp image and correct exposure. However, the manual also notes that users can override this mode for creative control when desired, offering a balance between automation and manual operation.
Shutter-Speed Priority AE Mode
The Canon AE-1’s Shutter-Speed Priority AE mode, detailed in the instruction manual, allows photographers to select a specific shutter speed to either freeze motion or create intentional blur. The camera then automatically adjusts the aperture to achieve proper exposure. This is ideal for sports or fast-moving subjects, or for artistic effects. The manual emphasizes understanding the relationship between shutter speed and aperture for optimal results in this mode.
Aperture-Priority AE Mode
The Canon AE-1’s Aperture-Priority AE mode, thoroughly explained in the instruction manual, empowers photographers to control depth of field by selecting a desired aperture. The camera then automatically sets the appropriate shutter speed for correct exposure. This mode is excellent for portraits, landscapes, or situations where controlling focus area is crucial. The manual stresses the interplay between aperture and depth of field for creative control.
Manual Exposure Control
The Canon AE-1 instruction manual details full manual control, allowing photographers to independently set both shutter speed and aperture for complete creative command.
Setting Shutter Speed Manually
The Canon AE-1’s instruction manual explains that shifting the shutter speed dial, located on the top panel, enables manual control. This dial offers a range from 2 seconds to 1/1000th of a second. Selecting ‘M’ on the mode selector unlocks this functionality, overriding automatic settings. The manual emphasizes careful consideration of lighting conditions and desired motion blur when choosing a shutter speed, impacting image brightness and sharpness.
Setting Aperture Manually
The Canon AE-1 instruction manual details aperture control via the lens’s aperture ring. After selecting ‘M’ for manual mode, rotate this ring to adjust the lens opening, influencing depth of field and light intake. Smaller f-numbers (like f/2.8) create shallow depth of field, while larger numbers (f/16) maximize sharpness throughout the scene. The manual stresses coordinating aperture with shutter speed for proper exposure.
Using the Light Meter Effectively
The Canon AE-1’s instruction manual emphasizes the light meter’s central role in achieving correct exposure. Observe the +/- indicators in the viewfinder; ‘0’ signifies accurate exposure. Positive values indicate overexposure, while negative values suggest underexposure. Adjust aperture or shutter speed until ‘0’ is displayed. The manual advises understanding how different scenes affect meter readings for optimal results.

Focusing System
The Canon AE-1’s manual details its manual focusing system, utilizing various focusing screens for clarity. Precise adjustments are key, alongside understanding depth of field principles.
Focusing Screen Types
The Canon AE-1 instruction manual outlines several focusing screen options, each impacting viewing and focusing ease. Standard screens offer a basic view, while split-image and microprism collar screens enhance critical focus accuracy. Newer screens, like the Accu-Matte, provide improved brightness and clarity. Interchangeable screens allow photographers to tailor the viewfinder to their specific shooting style and lens preferences, significantly aiding manual focusing precision and overall image quality.
Manual Focusing Techniques
The Canon AE-1 instruction manual details precise manual focusing methods. Utilize the viewfinder’s split-image or microprism collar for critical sharpness assessment. Slowly rotate the focusing ring until the image aligns or the microprisms coalesce. Practice depth-of-field estimation for landscapes. Fine-tune focus with slight adjustments, especially at wider apertures. Consistent practice refines technique, yielding consistently sharp images with this classic camera.
Depth of Field Control
The Canon AE-1 instruction manual explains depth of field’s impact on image sharpness. Aperture selection directly influences this range – smaller apertures (higher f-numbers) yield greater depth. Distance to the subject also matters; closer subjects reduce depth of field; Utilize the depth-of-field scale on the lens for precise control, ensuring foreground and background elements remain acceptably sharp.
Lenses and Compatibility
The Canon AE-1 utilizes the Canon FD lens mount, offering compatibility with a wide range of FD and New FD lenses, as detailed in the manual.
Canon FD Lens Mount
The Canon FD (Focusing Distinctive) lens mount was a cornerstone of Canon’s SLR system for over a decade, prominently featured with the AE-1. This breech-lock design, detailed in the instruction manual, offered a secure connection. It allowed for full aperture metering, a significant advantage. The FD mount’s three levers controlled the aperture, enabling smooth operation. Later New FD lenses improved upon this with electronic connections for enhanced functionality, though still fully compatible with the AE-1.
Compatible Lens Series
The Canon AE-1 boasts compatibility with a vast range of FD lenses, as outlined in the instruction manual. Initially, R-series lenses were usable with limited functionality. However, the primary lenses were the FD series, encompassing a wide spectrum of focal lengths and apertures. Later, the New FD (FDn) lenses offered electronic aperture control, still fully compatible. Super Canon lenses provided premium optical quality, enhancing image sharpness and clarity for discerning photographers.
Lens Features and Considerations
The Canon AE-1’s FD lenses, detailed in the manual, feature breech-lock focusing, requiring a distinct turning motion. Aperture rings control depth of field, while some lenses offer manual diaphragm control. Consider lens coatings for flare reduction and image contrast. The instruction manual emphasizes matching lens quality to photographic needs, noting variations in sharpness and maximum aperture capabilities across the FD range.

Battery Information
The Canon AE-1 utilizes a 4LR44 or equivalent 6V lithium battery, as detailed in the manual. Proper installation and replacement are crucial for accurate light metering functionality.
Battery Type and Specifications
The Canon AE-1 requires a 4LR44 6V lithium battery to power its light meter and other electronic functions. Sony US18650V3 lithium-ion batteries, though mentioned in related documentation, are not directly compatible. The 4LR44 offers a typical capacity suitable for extended use, and adherence to UL1642 safety standards is essential. Ensure the battery provides a stable 6V output for optimal camera performance, as detailed within the official Canon AE-1 instruction manual.
Battery Installation and Replacement
To install the 4LR44 battery, locate the battery compartment on the camera’s bottom. Carefully open the compartment and insert the battery, observing the correct polarity (+ and -) markings. Replacement is straightforward: remove the old battery and insert a fresh one. Always handle batteries with care, avoiding short circuits. Consult the Canon AE-1 instruction manual for detailed diagrams and safety precautions during battery handling and replacement procedures.
Troubleshooting Battery Issues
If the AE-1 displays a blinking battery check symbol, replace the 4LR44 battery immediately. Ensure correct battery polarity during installation. A weak battery can cause inaccurate exposure readings or camera malfunction. If issues persist after replacement, check the battery contacts for corrosion. Refer to the Canon AE-1 instruction manual for further diagnostic steps and potential solutions to resolve battery-related problems.

Using the Built-in Light Meter
The Canon AE-1’s light meter assists in achieving proper exposure. The instruction manual details metering modes and understanding the needle’s position for accurate results.
Metering Modes and Selection
The Canon AE-1’s instruction manual explains two primary metering modes: averaging and spot metering. Averaging, the default, evaluates light across the entire frame, suitable for general scenes. Spot metering concentrates on a small central area, ideal for challenging lighting or specific subjects. Selecting the appropriate mode, as detailed in the manual, is crucial for precise exposure. Understanding these options allows photographers to tailor metering to diverse shooting conditions, ensuring well-exposed images consistently.
Understanding Meter Readings
The Canon AE-1’s viewfinder displays a needle indicating exposure, as explained in the instruction manual. A centered needle signifies correct exposure. Needle movement to the plus (+) side indicates overexposure, while movement to the minus (-) side suggests underexposure. Photographers adjust shutter speed or aperture to center the needle, achieving optimal brightness. The manual emphasizes interpreting these readings for accurate and consistent results in various lighting scenarios.
Exposure Compensation
The Canon AE-1 instruction manual details exposure compensation for challenging lighting. This feature allows photographers to override the camera’s meter reading. Use positive compensation (+) for backlit scenes or subjects, brightening the image. Negative compensation (-) is useful for very bright subjects, preventing overexposure. The manual stresses practicing with this function to master accurate exposure in difficult conditions.

Advanced Features
The Canon AE-1 manual showcases features like self-timer, multiple exposures, and flash synchronization. These options expand creative control beyond basic automatic modes.
Self-Timer Operation
The Canon AE-1’s self-timer, detailed in the instruction manual, allows for delayed shutter release. Activating it involves moving the shutter speed dial to the ‘Self-Timer’ setting. A lamp illuminates, indicating the timer is engaged, providing approximately 10 seconds for composition. Pressing the shutter button initiates the countdown, culminating in automatic image capture. This feature is ideal for self-portraits or situations requiring the photographer to be included in the frame, offering a convenient hands-free shooting experience.
Multiple Exposure Techniques
The Canon AE-1 instruction manual explains how to create multiple exposures for artistic effects. After each exposure, prevent film advance by holding the film rewind knob inwards. This allows subsequent images to be superimposed on the same frame. Releasing the rewind knob resumes normal film advance. Experimentation with this technique yields surreal and layered imagery, offering creative control beyond standard photography, as detailed within the comprehensive guide.
Flash Photography with the AE-1
The Canon AE-1 instruction manual details flash photography options, including automatic and manual modes. Utilizing the AE-1’s dedicated flash unit or compatible external flashes allows for proper exposure in low-light conditions. The camera automatically sets the shutter speed in automatic mode, ensuring balanced illumination. Manual flash control provides creative flexibility, as described within the detailed user guide.

Maintenance and Care
The Canon AE-1 manual stresses regular cleaning of the body and lens. Proper storage, avoiding extreme temperatures, and careful handling ensure longevity and optimal performance.
Cleaning the Camera Body and Lens
The Canon AE-1 instruction manual recommends a soft, dry cloth for routine cleaning of the camera body. Avoid using solvents or abrasive cleaners, which can damage the finish. For stubborn dirt, a slightly dampened cloth may be used, ensuring no moisture enters the camera. Lens cleaning requires a dedicated lens cloth and cleaning solution; apply solution to the cloth, not directly to the lens. Gently wipe in a circular motion, avoiding excessive pressure. Regular cleaning preserves image quality and extends the camera’s lifespan.
Storage Recommendations
The Canon AE-1 instruction manual advises storing the camera in a cool, dry place, away from direct sunlight and extreme temperatures. Removing the batteries prevents corrosion and potential damage. A camera case offers protection against dust and accidental impacts. Store lenses separately, also in a dry environment. Long-term storage benefits from periodic checks to ensure no mold or deterioration occurs, preserving the camera’s functionality for future use.
Common Issues and Troubleshooting
The Canon AE-1 instruction manual details frequent problems like exposure errors or film advance issues. Check battery contacts and ensure proper film loading. Focusing difficulties often stem from incorrect screen adjustment. If the downrigger won’t tighten, inspect the mechanism. Consult the manual for specific error codes and solutions, or seek professional repair if issues persist, ensuring continued camera operation.
Troubleshooting Common Problems
The Canon AE-1 manual guides users through resolving issues like exposure errors, focusing difficulties, and film advance problems, ensuring continued photographic success.
Exposure Errors
The Canon AE-1 instruction manual details how to diagnose and correct exposure issues. Incorrect settings, weak batteries, or a faulty light meter can cause over or underexposure. Users learn to verify shutter speed and aperture, check battery strength, and utilize exposure compensation. Understanding the meter’s readings, as explained in the manual, is crucial for achieving properly exposed photographs, and the guide offers solutions for common discrepancies.
Focusing Difficulties
The Canon AE-1 instruction manual addresses potential focusing challenges. Issues can arise from incorrect focusing screen selection, poor lighting, or simply user technique. The manual guides users through manual focusing methods, emphasizing split-image and fine-focus adjustments. It also explains depth of field control, helping photographers achieve sharpness where desired, and troubleshooting blurry images is clearly outlined within the guide.
Film Advance Issues
The Canon AE-1 instruction manual details solutions for film advance problems. Common issues include film not advancing, or inconsistent winding. The manual instructs users to check for proper film loading, ensuring the film leader is correctly engaged with the take-up spool. It also covers potential mechanical obstructions and suggests careful inspection of the film transport mechanism for smooth operation.

Resources and Further Learning
Online manuals and active forums provide extensive Canon AE-1 support. PDF versions of the instruction manual are readily available, alongside community expertise.
Online Manuals and Guides
Numerous websites host downloadable Canon AE-1 program manuals in PDF format, offering detailed guidance on operation. These resources cover everything from basic film loading to advanced exposure techniques. Searching online reveals single-page processed JP2 ZIP files and comprehensive guides, often exceeding 88 pages. These digital versions replicate the original printed instruction manual, providing a convenient way to learn and reference the camera’s features, ensuring users can fully utilize its capabilities.
Canon AE-1 Communities and Forums
Online communities dedicated to the Canon AE-1 provide invaluable support and shared knowledge. Forums allow users to discuss troubleshooting, lens compatibility, and creative techniques, supplementing the instruction manual. These platforms foster a collaborative environment where enthusiasts exchange tips, repair advice, and experiences with the camera. Finding answers to specific questions and connecting with fellow AE-1 users is readily available through these digital spaces.
Repair Services and Support
While the Canon AE-1 is a durable camera, repairs may become necessary over time. Specialized repair services offer expertise in restoring functionality, addressing issues beyond the scope of the instruction manual. Finding qualified technicians familiar with vintage film cameras is crucial. Support resources, including online guides and repair shops, ensure the longevity of this classic camera, preserving its photographic capabilities for future use.