
Panasonic Bread Maker: A Comprehensive Manual Guide
Discover detailed instructions and recipes for your Panasonic bread maker, ensuring perfect loaves every time. Explore manuals, firmware downloads, and safety precautions.
Panasonic bread makers represent a fusion of innovative technology and user-friendly design, simplifying the art of home baking. These appliances, as detailed in numerous manuals, offer a convenient way to enjoy fresh, homemade bread without extensive effort. From basic white bread to complex gluten-free recipes, Panasonic models cater to diverse dietary needs and preferences.
The YeastPro technology, a hallmark of many Panasonic bread makers, optimizes yeast activity for consistently superior results. Understanding your specific model’s features, as outlined in the operating instructions, is crucial for maximizing its potential. Accessing firmware downloads ensures your appliance remains up-to-date with the latest enhancements.
Understanding Your Model: Identifying Key Features
Panasonic bread maker models boast a range of features, detailed within their respective manuals. Key components include the bread pan, kneading blade, and control panel. Familiarize yourself with the menu navigation for program selection – white bread, whole wheat, sweet, and custom options are common.
The control panel allows adjustment of bake time, crust color (light, medium, dark), and loaf size. Some models feature specialized programs like gluten-free or rapid bake. Refer to your model’s instructions for specific function locations. Understanding these features, and accessing available firmware downloads, unlocks the full potential of your appliance.

Getting Started with Your Panasonic Bread Maker
Begin by unboxing, identifying parts, and performing a test bake. Consult your manual for cleaning instructions and initial setup guidance for optimal results.
Unboxing and Initial Setup
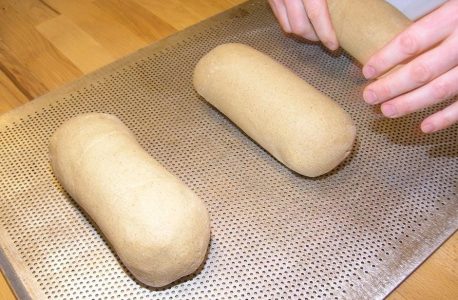
Carefully unpack your new Panasonic bread maker, ensuring all components are present; Retain the packaging for potential future transport or storage. Before the first use, remove any protective films or stickers from the appliance and its parts. Thoroughly inspect the bread pan, kneading blade, and other accessories for any shipping damage. Refer to the included manual for a detailed parts list and diagram. Place the bread maker on a stable, level surface away from water sources and direct heat. Ensure adequate ventilation around the unit. Familiarize yourself with the power cord and plug, and confirm compatibility with your electrical outlet. Initial setup involves a gentle cleaning of all removable parts with warm, soapy water – a crucial step before baking your first loaf!
Parts Identification: Bread Pan, Kneading Blade, and More
Your Panasonic bread maker includes several key components. The bread pan, typically non-stick coated, holds the ingredients during baking. The kneading blade, essential for dough development, attaches to the drive shaft within the pan. A measuring cup and spoon are provided for accurate ingredient addition. Some models feature a yeast dispenser for timed yeast activation. Refer to your manual’s diagram for precise placement of each part. Locate the heating element and sensor, crucial for temperature control. Identify the control panel with its buttons and display screen. Understand the lid locking mechanism for safe operation. Proper identification ensures correct assembly and usage, maximizing baking performance.
First-Time Use: Cleaning and Test Bake
Before your initial bake, thoroughly clean the bread pan and kneading blade with warm, soapy water. Wipe down the bread maker’s interior and exterior. A test bake helps familiarize you with the machine’s operation and removes any manufacturing residue. Use a simple white bread recipe, following the manual’s instructions precisely. Select a basic program and a medium crust color. Observe the kneading and baking process. This initial run ensures everything functions correctly and prepares the machine for consistent results. Discard the test loaf and enjoy future, perfectly baked breads!

Operating Instructions: Core Functionality
Master menu navigation, program selection, and ingredient order for optimal results. Precisely set bake time, crust color, and loaf size using your Panasonic manual.
Menu Navigation and Program Selection
Your Panasonic bread maker features an intuitive control panel for effortless operation. Begin by powering on the device and utilizing the menu button to cycle through available programs. These typically include options for basic, whole wheat, sweet, rapid, and gluten-free baking. Refer to your specific model’s manual for a complete program list and descriptions.
Program selection is confirmed with the ‘Start’ button. Some models offer a ‘Pause/Stop’ function for mid-cycle adjustments. Carefully review the instructions regarding program-specific settings, as certain programs may automatically adjust kneading and baking times. Understanding these nuances, detailed in the manual, is crucial for achieving desired results. Explore custom program options for personalized baking experiences.
Ingredient Measurement and Order of Addition
Precise ingredient measurement is vital for successful bread making with your Panasonic machine. Always use measuring cups and spoons specifically designed for baking. The manual emphasizes the importance of adding ingredients in the correct order: liquids first, followed by dry ingredients, with yeast added last. This prevents premature yeast activation.
Typically, water, oil, and sweeteners are added initially, then flour, salt, and finally, the yeast. Some recipes may deviate slightly; always consult the specific recipe within your manual. Incorrect order or inaccurate measurements can lead to poor texture or a loaf that doesn’t rise properly. Refer to the manual’s guidelines for optimal results.
Setting Bake Time, Crust Color, and Loaf Size
Panasonic bread makers offer customizable baking options. Your manual details how to adjust bake time based on the selected program and desired loaf characteristics. Crust color settings typically range from light to dark, influencing the final appearance and texture. Loaf size options – often small, medium, and large – allow you to tailor the bread to your household’s needs.
The manual provides guidance on selecting appropriate settings for different recipes. Experimenting with these settings is encouraged, but always refer to the manual for recommended ranges. Incorrect settings can affect the bread’s texture, color, and overall quality. Precise control ensures consistently delicious results.

Recipes and Baking Programs
Explore a variety of recipes – from basic white to sweet breads – utilizing pre-programmed settings on your Panasonic bread maker for optimal results.
Basic White Bread Recipe
Yields: 1 standard loaf (approximately 1;5 lbs). Prep time: 10 minutes; Cook time: Approximately 3 hours (including rise time). This recipe is designed for most Panasonic bread maker models, but always consult your specific manual for program recommendations.
Ingredients: 3 cups (360g) bread flour, 1 ¼ cups (300ml) water, 2 tablespoons (30ml) vegetable oil, 1 ½ teaspoons (5g) salt, 2 ¼ teaspoons (7g) active dry yeast, 1 tablespoon (15ml) sugar.
Instructions: Add ingredients to the bread pan in the order listed – water, oil, salt, sugar, flour, and finally, yeast. Select the “Basic” or “White Bread” program on your Panasonic bread maker. Choose your desired loaf size and crust color. Press start and enjoy freshly baked bread!
Whole Wheat Bread Recipe
Yields: 1 standard loaf (approximately 1.5 lbs). Prep time: 10 minutes. Cook time: Approximately 3 hours 30 minutes (including rise time). This recipe utilizes whole wheat flour, requiring slightly longer proofing. Refer to your Panasonic bread maker manual for optimal program selection.
Ingredients: 2 cups (240g) whole wheat flour, 1 cup (120g) bread flour, 1 ¼ cups (300ml) water, 2 tablespoons (30ml) honey, 1 ½ teaspoons (5g) salt, 2 ¼ teaspoons (7g) active dry yeast, 1 tablespoon (15ml) vegetable oil.
Instructions: Add ingredients to the bread pan in the order listed: water, oil, honey, salt, whole wheat flour, bread flour, and yeast. Select the “Whole Wheat” program. Choose desired loaf size and crust color. Press start and savor wholesome, homemade bread!
Sweet Bread and Dessert Recipes
Explore delightful sweet options with your Panasonic bread maker! Consult your manual for dedicated “Sweet” or “Dessert” programs. These recipes often require adjusting ingredient ratios and proofing times. Remember to use rapid-rise yeast for optimal results in sweet doughs.
Cinnamon Raisin Bread: Add ½ cup raisins and 2 tablespoons cinnamon-sugar to basic white bread dough. Chocolate Bread: Incorporate ¼ cup cocoa powder and ½ cup chocolate chips. Apple Cinnamon Dessert: Layer sliced apples and cinnamon-sugar between dough layers.
Always monitor baking closely, as sweet breads brown faster. Refer to your manual for specific program settings and adjustments. Enjoy homemade treats effortlessly!
Advanced Features and Customization
Unlock personalized baking with YeastPro technology and custom program settings. Tailor bake time, crust color, and loaf size via your Panasonic manual.
YeastPro Technology: Optimizing Yeast Activity
Panasonic’s innovative YeastPro technology is a cornerstone of their bread maker design, significantly enhancing yeast activity for consistently superior results. This feature meticulously controls temperature and humidity throughout the entire baking process, creating an ideal environment for optimal yeast fermentation. The manual details how YeastPro automatically adjusts proofing times based on ambient conditions, ensuring a perfect rise even in varying climates.
By precisely managing these crucial elements, YeastPro maximizes the yeast’s potential, leading to lighter, fluffier bread with enhanced flavor and texture. The manual emphasizes the importance of using fresh yeast for best results when utilizing this technology. Understanding YeastPro allows users to consistently achieve bakery-quality bread within the comfort of their own kitchens, as explained within the product’s comprehensive guide.
Custom Program Settings: Tailoring Your Bake
Panasonic bread makers offer extensive customization options, allowing bakers to precisely tailor each loaf to their preferences. The manual details how to adjust bake times, crust colors (light, medium, dark), and loaf sizes (1.0lb, 1.5lb, 2.0lb) to achieve desired results. Users can create custom programs by manually setting each parameter, offering complete control over the baking process.
Beyond basic adjustments, the manual explains how to modify kneading times and proofing durations for specific recipes or flour types. This level of control is invaluable for experimenting with different ingredients and achieving unique textures. Mastering these custom settings, as outlined in the manual, unlocks the full potential of your Panasonic bread maker, enabling truly personalized baking experiences.
Gluten-Free Baking with Your Panasonic Bread Maker
Panasonic bread makers, as detailed in the manual, often include a dedicated gluten-free program. This program is specifically designed to accommodate gluten-free flour blends, which behave differently than traditional wheat flour. The manual emphasizes the importance of using a 1:1 gluten-free flour blend with added xanthan gum, crucial for binding and structure.
It provides guidance on ingredient ratios and suggests specific gluten-free recipes. The manual also notes that gluten-free doughs typically require more liquid and may have a different consistency. Following the manual’s instructions ensures successful gluten-free baking, yielding loaves with improved texture and rise, despite the absence of gluten.

Troubleshooting Common Issues
Refer to your Panasonic manual for solutions to problems like dough not rising, burning, or a stuck kneading blade – ensuring baking success!
Bread Not Rising: Causes and Solutions
Insufficient yeast is a primary culprit; always check the expiration date and ensure proper measurement as detailed in your Panasonic manual. Incorrect liquid temperatures – too hot or too cold – can deactivate yeast, hindering rise. Also, excessive salt inhibits yeast activity, so precise measurements are crucial.
Another factor is inadequate kneading. The manual emphasizes the importance of a well-developed gluten structure for trapping gases. Ensure the kneading blade is properly attached and functioning. Finally, ambient temperature plays a role; a cold kitchen can slow down proofing. Refer to your manual’s troubleshooting section for specific model guidance and consider a warmer location for proofing if needed.
Burning or Uneven Baking: Adjusting Settings
If your Panasonic bread maker produces burnt or unevenly baked bread, first consult your manual regarding crust color settings. Lowering the crust setting is the simplest adjustment. Uneven baking often stems from ingredient distribution; ensure even layering as outlined in the manual’s recipe section.
Check the heating element for any obstructions, though this requires professional servicing. The manual may advise against opening the lid during baking, as this releases heat and disrupts the process. Experiment with slightly reducing bake time, monitoring closely. Finally, ensure the correct program is selected for your loaf type, as detailed in the manual’s program guide.
Kneading Blade Stuck in Bread: Removal Techniques

A common issue is the kneading blade becoming lodged within the baked loaf. Always unplug the Panasonic bread maker before attempting removal, as detailed in the manual’s safety section. Allow the bread and pan to cool completely; a warm loaf is more difficult to manage.
Use a non-metallic utensil – plastic or wood – to gently dislodge the blade, avoiding damage to the non-stick coating. The manual may suggest using a hooked tool specifically for this purpose. If firmly stuck, try gently rocking the pan. Never force it, as this could break the blade. Consult the manual for diagrams illustrating proper removal.

Maintenance and Care
Ensure longevity by cleaning the bread pan and components, storing the maker properly, and checking for available firmware downloads, as per the manual.
Cleaning the Bread Pan and Other Components
Thorough cleaning is vital for maintaining your Panasonic bread maker’s performance and hygiene. Always unplug the appliance and allow all parts to cool completely before cleaning. The bread pan and kneading blade are typically non-stick coated; hand washing with warm, soapy water is recommended to avoid damaging the coating. Avoid abrasive cleaners or scouring pads.
The lid and exterior of the bread maker can be wiped clean with a damp cloth. Ensure no water enters the machine’s internal components. The kneading blade can sometimes be tricky to remove; gently twist and pull. Refer to your specific model’s manual for detailed instructions. Regularly cleaning prevents residue buildup and ensures optimal baking results.
Proper Storage of Your Bread Maker
To ensure the longevity of your Panasonic bread maker, proper storage is essential. Before storing, ensure the appliance is completely dry and clean, following the cleaning instructions in the manual. Store the bread maker in a cool, dry place, away from direct sunlight and extreme temperatures.
Avoid storing it in damp environments like basements or near water sources. If possible, store it in its original packaging to protect it from dust and scratches. Secure the power cord to prevent damage. Regularly checking the storage area will help maintain optimal conditions and prevent potential issues. Refer to your manual for specific storage recommendations.
Firmware Updates and Downloads
Panasonic occasionally releases firmware updates for your bread maker to improve performance and add new features. These updates can be downloaded from the official Panasonic website, typically within the support section for your specific model. Before downloading, carefully read the update instructions provided, as incorrect installation can cause issues.
Ensure your bread maker is connected to a stable power source during the update process. Follow the manual’s guidance precisely. Regularly checking for updates ensures your appliance functions optimally. Downloads are usually available as a file that needs to be transferred via USB or a similar method, as detailed in the manual.

Safety Precautions
Always follow instructions, avoid improper use, and never remove the bread pan during operation. Electrical safety is paramount; unplug before cleaning.
Important Warnings and Guidelines
Prior to operating your Panasonic bread maker, carefully review all provided instructions to ensure safe and optimal performance. Never immerse the appliance in water or any other liquid. Avoid operating the bread maker with a damaged cord or plug, and always unplug it before cleaning or performing maintenance.
Do not remove the bread pan or interrupt the baking cycle prematurely, as this could result in burns or damage to the unit. Keep the appliance out of reach of children. Ensure proper ventilation during operation, and avoid placing the bread maker near flammable materials. Panasonic disclaims liability for improper use or failure to follow these guidelines.
Electrical Safety Information
To prevent electrical shock, never operate the Panasonic bread maker with a damaged cord or plug. Always ensure the voltage indicated on the appliance matches your household supply. Do not use an extension cord unless absolutely necessary, and if so, select one rated for the appliance’s wattage.
Avoid operating the bread maker in damp environments or with wet hands. Unplug the appliance from the outlet when not in use and before cleaning. Never attempt to repair the bread maker yourself; contact qualified service personnel for assistance. Panasonic is not responsible for damages resulting from electrical misuse.

Warranty Information
Panasonic offers a limited warranty on its bread makers, covering defects in materials and workmanship. Contact Panasonic customer support for details and claims.
Panasonic Bread Maker Warranty Details
Panasonic provides a standard one-year limited warranty on its automatic bread makers, commencing from the original purchase date. This warranty safeguards against manufacturing defects in materials and workmanship under normal household use. It doesn’t cover damage resulting from misuse, accidents, unauthorized repairs, or alterations.
The warranty encompasses repair or replacement of defective parts, at Panasonic’s discretion. To initiate a warranty claim, retain your proof of purchase and contact Panasonic customer support. Shipping costs to and from the service center are the responsibility of the consumer. This warranty gives you specific legal rights, and other rights may vary by location.
Contacting Panasonic Customer Support
For assistance with your Panasonic bread maker, reach out to their dedicated customer support team. You can find contact information on the official Panasonic website, typically including a toll-free phone number and email address. Online support resources, such as FAQs and troubleshooting guides, are also readily available.
When contacting support, have your model number and proof of purchase handy to expedite the process. Panasonic aims to provide prompt and helpful assistance with any questions or concerns regarding your appliance. Explore their website for downloadable manuals and firmware updates too.