
Honeywell Water Heater Control Manual: A Comprehensive Guide
This manual details Honeywell water heater controls, including gas valve boards (WV8840A1000, WV8840B1109, WV8840B1158),
safety, troubleshooting, and advanced systems like MC and TGM50․
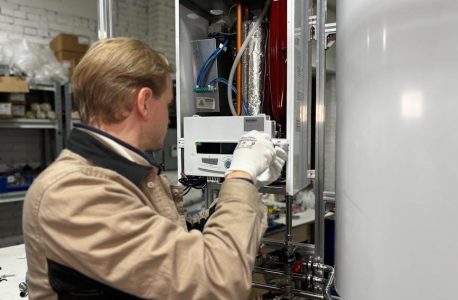
Honeywell’s water heater controls represent a significant advancement in home comfort and energy efficiency․ These systems, encompassing gas valve boards like the WV8840 series, are designed to reliably manage and optimize water heating processes․ Understanding these controls is crucial for both professional technicians and homeowners seeking to maintain optimal performance․
The controls integrate safety features, precise temperature regulation, and increasingly, smart home connectivity․ Modern Honeywell systems, including those utilizing the MC system for data export, offer enhanced diagnostics via error codes (like those found in Wolf boilers – F2 for example) and compatibility with external ACS water heaters․ Proper installation, as detailed for thermostats like the TGM50, is paramount for safe and efficient operation․
Understanding Honeywell Gas Valve Boards
Honeywell gas valve boards, such as the WV8840A1000, WV8840B1109, and WV8840B1158 series, are the central control units for gas-fired water heaters․ They regulate gas flow to the burner, ensuring safe and efficient heating․ These boards receive signals from temperature sensors and control circuits to maintain the desired water temperature․
Repair kits, like the Wsensor kit for the WV8840B1109, are available for common failures․ Understanding the wiring diagrams and error codes associated with these boards is essential for troubleshooting․ They often communicate via RS485 Modbus, enabling integration with smart home systems and remote monitoring using Python libraries․
Common Honeywell Water Heater Control Models
Several Honeywell models are frequently encountered in water heater systems․ The WV8840A1000 is a widely used gas valve control, while the WV8840B1109 and WV8840B1158 series are popular replacements, often supported by dedicated Wsensor repair kits․ These boards manage gas flow and burner operation based on temperature feedback․
Understanding the specific features of each model is crucial for accurate troubleshooting and repair․ Compatibility with various tank brands, like Bradford White, A․O․ Smith, and Rheem, is a key consideration․ Utilizing appropriate repair kits and referencing detailed wiring diagrams are essential for successful maintenance․

WV8840A1000 Series
The Honeywell WV8840A1000 is a foundational gas valve control board utilized in numerous water heater applications․ It regulates gas supply to the burner, ensuring safe and efficient operation based on thermostat settings․ This model is known for its reliability, but can experience failures requiring replacement․ Identifying the correct replacement part is vital for compatibility․
Troubleshooting often involves checking wiring connections and verifying proper voltage supply․ Understanding the board’s function within the overall water heater system is key․ Repair kits may be available for specific component failures, extending the board’s lifespan․
WV8840B1109 & WV8840B1158 Series
The WV8840B1109 and WV8840B1158 represent updated iterations of the Honeywell gas valve control board, commonly found in modern water heater systems․ These series often feature enhanced diagnostic capabilities and improved component reliability compared to earlier models․ A dedicated Wsensor repair kit (WV8840B1109) is available, addressing frequent failure points․
Troubleshooting these boards involves interpreting error codes and carefully examining wiring connections․ Replacement kits, like the WV8840B1158 repair kit, offer cost-effective solutions․ Proper installation and adherence to safety precautions are crucial during any repair or maintenance procedure․
Safety Precautions Before Working with Your Water Heater
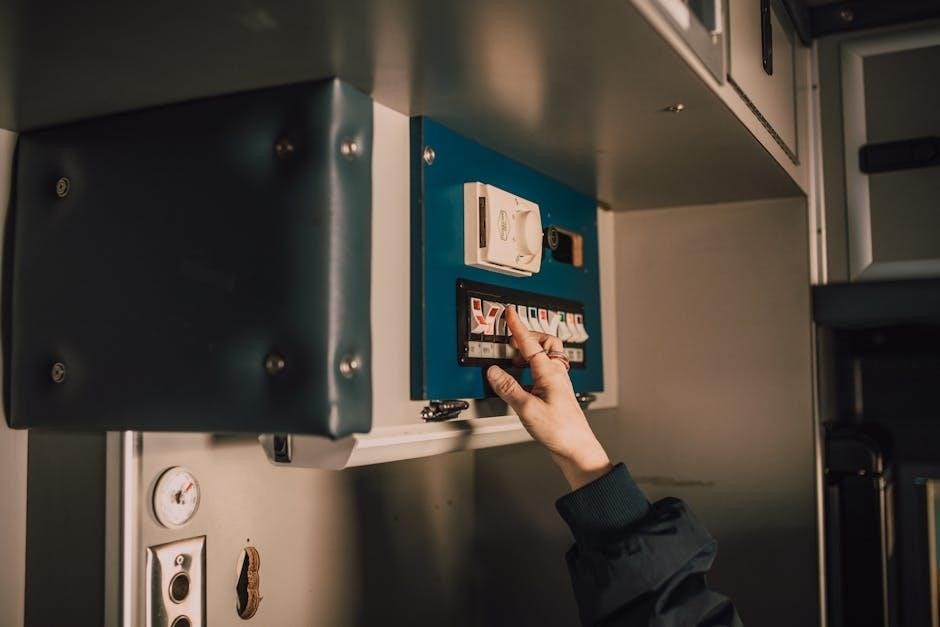
Prioritize safety when servicing your Honeywell water heater․ Always disconnect the electricity supply to the boiler using the ON/OFF keys before commencing any work․ Ensure the power lead is disconnected and inspected for damage․ Allow the heater to cool down completely to prevent burns․
Gas connections should only be handled by qualified professionals․ Never attempt repairs if you smell gas․ Be mindful of potential water hazards and wear appropriate protective gear․ Following these precautions minimizes risks during maintenance and repair, ensuring a safe working environment․
Tools Required for Repair and Maintenance
Essential tools for Honeywell water heater maintenance include a screwdriver set (Phillips and flathead), wire strippers, and a multimeter for electrical testing․ A wrench set is crucial for gas line connections – always ensure proper tightening․ Diagnostic tools, like a gas leak detector, are highly recommended for safety․
Depending on the repair, you might need a socket set, pliers, and potentially specialized tools for accessing specific components․ Having a repair kit (like the Wsensor kit WV8840B1109) readily available streamlines the process․
Troubleshooting Common Issues
Common problems with Honeywell water heaters include a lack of hot water, often stemming from gas valve malfunctions or pilot light failures․ Error codes, such as F2 on Wolf boilers, pinpoint specific issues like fan problems․ Gas valve issues require careful inspection; a malfunctioning valve may necessitate replacement․
Pilot light issues can be caused by a dirty pilot assembly or a faulty thermocouple․ Always prioritize safety – if you smell gas, immediately shut off the supply and contact a professional․
No Hot Water
A complete lack of hot water often indicates a problem with the gas supply, the gas valve, or the electronic control board․ Begin by verifying the gas supply is active․ Inspect the gas valve for proper operation; a faulty valve prevents gas flow to the burner․ Check for error codes displayed on the control panel, as these provide valuable diagnostic clues․
A malfunctioning Wsensor or a failed ignition system can also cause this issue; Ensure the pilot light (if applicable) is lit and stable․ If problems persist, professional assistance is recommended․
Pilot Light Problems
Difficulty maintaining a stable pilot light frequently points to a dirty or faulty pilot assembly․ A clogged pilot orifice restricts gas flow, preventing consistent ignition․ Check the thermocouple; a failing thermocouple won’t reliably sense the pilot flame, shutting off the gas supply as a safety measure․ Ensure proper ventilation around the pilot light area․
Inspect the gas valve for correct pressure regulation․ If the pilot light repeatedly extinguishes, even after cleaning and adjustments, a gas valve replacement might be necessary․ Always prioritize safety when working with gas appliances․
Gas Valve Malfunctions
A malfunctioning gas valve can manifest in several ways, including no hot water, inconsistent heating, or a complete system shutdown․ Internal components may fail, preventing proper gas flow to the burner․ Electrical issues within the valve can also disrupt operation․ Carefully inspect the valve for any visible damage or corrosion․
Testing the valve’s solenoid with a multimeter can reveal electrical faults․ Replacement is often the most practical solution for a faulty gas valve, ensuring safe and reliable operation․ Always disconnect power and gas before any inspection or repair․
Replacing the Gas Valve Board
Replacing the gas valve board requires careful attention to detail and safety precautions․ Begin by disconnecting power and gas supply to the water heater․ Document the existing wiring connections before removal, or take clear photographs for reference․ Carefully detach the old board, noting the position of each wire․
Install the new board, ensuring all wires are connected to their corresponding terminals․ Double-check the wiring diagram for accuracy․ Restore power and gas, then test the system to confirm proper operation․ A successful replacement restores control and functionality․
Step-by-Step Replacement Guide
Begin by shutting off gas and electrical power to the water heater․ Carefully remove the access panel to expose the gas valve board․ Document existing wire connections – photos are highly recommended! Disconnect each wire, labeling as you go․ Gently remove the old board․ Install the new board, meticulously connecting each wire to its labeled terminal․
Verify all connections against the wiring diagram․ Replace the access panel․ Restore power and gas, following safety guidelines․ Test the heater’s operation, checking for proper ignition and temperature control․ A methodical approach ensures a successful replacement․
Wiring Diagram Overview
Honeywell gas valve board wiring diagrams illustrate connections for power, gas valve actuators, sensors (like the wsensor), and control signals․ Key components include the high-limit switch, flame sensor, and gas valve itself․ Diagrams detail wire colors and terminal designations for accurate connections․
Understanding the diagram is crucial for safe and correct board replacement․ Pay close attention to grounding wires and sensor placements․ Incorrect wiring can lead to malfunction or safety hazards․ Refer to the specific model’s diagram, as variations exist between series․
Repair Kits: Wsensor Repair Kit (WV8840B1109) & Others
Honeywell offers repair kits, notably the Wsensor Repair Kit (WV8840B1109), designed for common failures in gas valve boards․ These kits typically include replacement sensors, igniters, or gas valve components․ Utilizing a kit can be more cost-effective than replacing the entire board․
Other available kits address specific issues within different Honeywell control models․ Always verify kit compatibility with your exact water heater model number before purchase and installation․ Proper installation, following the manual, is vital for optimal performance and safety․
Understanding Error Codes
Honeywell water heater control systems utilize error codes to diagnose malfunctions․ These codes, displayed on the control panel, pinpoint specific issues within the system, aiding in efficient troubleshooting․ For example, Wolf gas boilers may display an “F2” error, indicating a supply fan problem․
Consult your specific model’s documentation for a complete list of error codes and their corresponding solutions․ Ignoring error codes can lead to further damage or unsafe operating conditions․ Accurate interpretation is crucial for effective repair and maintenance․
Wolf Gas Boiler Error Codes (Example: F2)
Wolf gas boilers, controlled by Honeywell systems, employ specific error codes for diagnostics․ An example is error code “F2,” which signals a problem with the supply fan – potentially a malfunction, blockage, or wiring issue․ This code requires immediate attention to prevent overheating or inefficient operation․
Refer to the Wolf boiler’s dedicated error code list for a comprehensive understanding of all potential issues․ Proper interpretation and addressing of these codes are vital for maintaining safe and reliable heating performance․ Ignoring these signals can lead to system failure․
Cleaning and Maintenance Procedures
Regular cleaning extends the lifespan of your Honeywell-controlled water heater․ Always wait for the unit to cool completely before commencing any cleaning․ The exterior can be washed with water, but ensure the power lead is disconnected for safety․ Avoid directing water into control panels or electrical components․
Periodic inspection of connections and removal of dust buildup are crucial․ For systems connected to external ACS water heaters, follow specific ACS maintenance guidelines․ Consistent upkeep prevents malfunctions and maintains optimal efficiency, ensuring reliable hot water supply․

Cleaning the Water Heater
Before cleaning, completely disconnect the power supply to the water heater․ Allow the unit to cool down thoroughly to prevent burns․ The exterior surfaces can be cleaned with a damp cloth and mild detergent․ Avoid abrasive cleaners that could damage the finish․
Inspect the burner assembly for debris and carefully remove any obstructions․ Do not attempt to disassemble internal components․ Ensure all electrical connections are dry before restoring power․ Regular exterior cleaning maintains appearance and helps identify potential issues early on․
Washing the Exterior
To wash the exterior, first ensure the power lead is disconnected and the heater is completely cool․ Use a damp cloth with mild soap and water to gently wipe down the surfaces․ Avoid harsh chemicals or abrasive cleaners, as these can damage the finish and potentially compromise safety․
Pay attention to areas prone to dust and grime buildup․ Rinse with a clean, damp cloth and dry thoroughly․ Regular exterior washing helps maintain the unit’s appearance and allows for easier inspection of components․
Electrical Considerations
Honeywell water heater controls require careful electrical handling․ Ensure the electricity supply to the boiler is switched ON or OFF using designated keys, adhering to safety protocols․ Always prioritize power lead safety; inspect for damage before use and avoid water contact․
Incorrect wiring or a faulty power supply can lead to malfunctions or hazards․ If unsure about any electrical aspect, consult a qualified technician․ Proper grounding is crucial for safe operation․ Remember to disconnect power before any maintenance or repair work․
Electricity Supply to the Boiler (ON/OFF Keys)
The boiler’s operation is directly controlled by its electricity supply, managed via dedicated ON/OFF keys․ These keys regulate power to the internal components, initiating or halting the heating process․ Understanding their function is vital for safe and efficient operation․ Always confirm the power supply is stable before activating the boiler․
Ensure the keys are functioning correctly; any issues should be addressed by a qualified technician․ Incorrect use can lead to system errors or damage․ Proper operation ensures consistent heating performance and longevity of the unit․
Power Lead Safety
Prioritizing power lead safety is crucial when working with your Honeywell water heater․ Always disconnect the power lead before performing any maintenance or cleaning to prevent electrical shock․ Inspect the lead regularly for damage – cracks, fraying, or exposed wires – and replace it immediately if any are found․
Ensure the lead is securely connected to both the boiler and the power outlet․ Avoid bending or straining the lead, as this can compromise its integrity․ Never operate the heater with a damaged power lead; it poses a significant safety hazard․

Connecting to External Water Heaters (ACS)
Honeywell systems offer compatibility with external water heaters, specifically ACS (Accumulateur de Chaleur Sanitaire) units, expanding heating capabilities․ Proper connection ensures efficient and integrated operation between the boiler and the external heater․ This setup allows for increased hot water capacity and potentially reduced energy consumption․
Carefully follow the manufacturer’s instructions for connecting the ACS unit to your Honeywell boiler․ Verify correct wiring and plumbing connections, ensuring adherence to local safety regulations․ A properly connected ACS system optimizes overall heating performance․
Advanced Control Systems: MC System
The Honeywell MC System represents a sophisticated advancement in water heater control, featuring a multi-user panel designed for enhanced management and monitoring․ This system incorporates dedicated software and devices, enabling seamless data export to a personal computer for detailed analysis and reporting․
The MC System allows for comprehensive control over heating parameters, optimizing efficiency and performance․ Its multi-user functionality facilitates collaborative management, while the data export capability provides valuable insights into system operation and potential areas for improvement․
Multi-User Panel Features
The MC System’s multi-user panel offers a collaborative control environment, allowing multiple authorized personnel to access and manage water heater settings․ Each user can be assigned specific permissions, ensuring secure and controlled operation․ This feature is particularly beneficial for facilities management or commercial applications where several individuals require access․
The panel provides a clear and intuitive interface, simplifying complex control functions․ User-specific profiles enhance accountability and streamline workflows, improving overall system management and responsiveness․ It promotes efficient operation and reduces potential errors․
Data Export to PC
The Honeywell MC System facilitates seamless data export to a personal computer, enabling comprehensive performance analysis and historical record-keeping․ This capability allows users to download operational data, including temperature readings, error logs, and system settings, for detailed review and reporting․
Data can be exported in various formats, compatible with common spreadsheet and database applications․ This feature supports proactive maintenance scheduling, identifies potential issues, and optimizes energy consumption․ It’s invaluable for long-term system monitoring and informed decision-making regarding water heater performance․
Thermostat Integration: TGM50 Thermostat
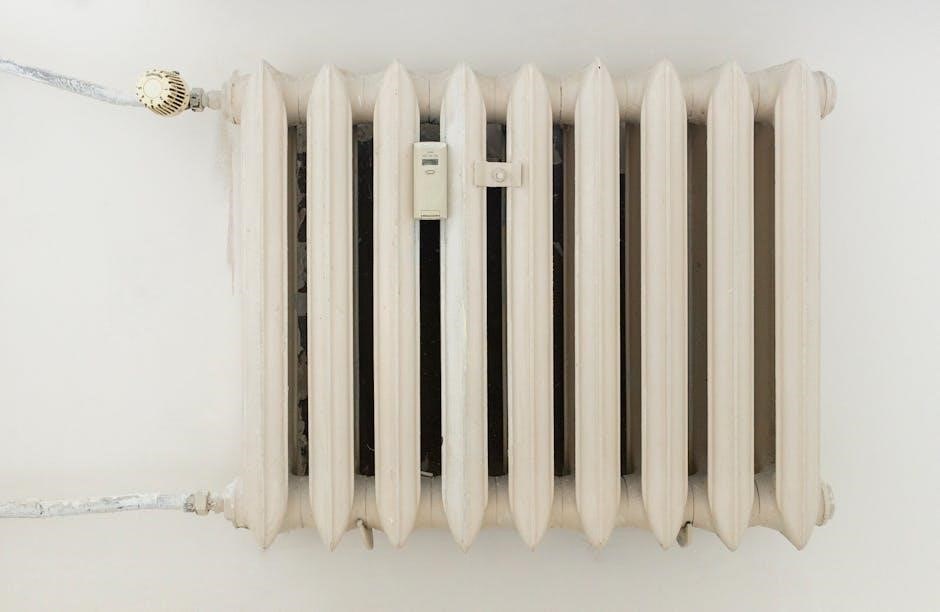
The Honeywell TGM50 thermostat offers advanced control and integration with compatible water heater systems․ This thermostat provides precise temperature regulation, enhancing comfort and energy efficiency․ Installation involves careful attention to electrical specifications, ensuring proper wiring and voltage compatibility․
Mounting procedures require secure attachment to a suitable location, away from direct heat sources․ Advanced features include programmable schedules and remote control capabilities․ The TGM50 streamlines water heating management, optimizing performance and reducing energy waste for a more comfortable and cost-effective experience․
Electrical Specifications
The TGM50 thermostat operates on a standard voltage, typically 24VAC, ensuring compatibility with most residential heating systems․ Current draw is minimal, optimizing energy efficiency during operation․ Wiring configurations require adherence to specific color codes for proper functionality and safety․
The device is designed for indoor use only, protected from direct moisture and extreme temperatures․ Proper grounding is essential to prevent electrical hazards․ Always disconnect power before installation or maintenance․ Confirm voltage matches your system before connecting to avoid damage or malfunction․
Mounting and Installation
Prior to installation, ensure the power supply is completely disconnected at the breaker to prevent electrical shock․ Select a suitable location for the TGM50 thermostat, away from direct sunlight, drafts, and heat sources․ Mount the base plate securely to the wall using appropriate screws and anchors․
Carefully connect the wiring according to the provided wiring diagram, verifying each connection․ Attach the thermostat body to the base plate․ Power on the system and verify proper operation․ Consult a qualified technician if you encounter any difficulties during installation․
RS485 Modbus Communication with Honeywell Units
This section details communication with Honeywell (Resideo) water heater controls via RS485 Modbus․ A Python library facilitates control and data acquisition from residential units and accessories․ Compatibility extends to various tank brands like Bradford White, A․O․ Smith, and Rheem․
Utilize the library for reading data and sending commands․ Ensure proper wiring and configuration of Modbus parameters․ This allows integration with custom control systems and monitoring applications, enhancing functionality beyond the standard interface․
Python Library for Control
A dedicated Python library enables seamless communication with Honeywell (Resideo) residential water heater control units․ This library simplifies the process of interacting with the devices over RS485 Modbus, allowing developers to build custom control and monitoring solutions․
The library provides functions for reading data, sending commands, and handling communication errors․ It supports various Honeywell models and accessories, streamlining integration efforts․ Developers can leverage this tool to create advanced applications tailored to specific needs;
Compatibility with Various Tank Brands
Honeywell water heater controls demonstrate broad compatibility, extending beyond a single manufacturer’s tank offerings․ The systems are designed to integrate effectively with popular brands like Bradford White, A․O․ Smith, and Rheem, providing versatile solutions for diverse installations․
This compatibility simplifies upgrades and replacements, allowing users to leverage Honeywell’s advanced control features regardless of their existing water heater․ The Python library further enhances this flexibility, enabling custom integrations with a wider range of tank models․
Fuel Control Components
Honeywell water heater systems utilize sophisticated fuel control components for optimal performance and safety․ Key elements include the HydroMechanical Unit (HMU), responsible for precise fuel regulation, and the fuel pump, which ensures consistent fuel delivery to the burner․
These components work in tandem to maintain stable combustion and efficient heating․ Understanding their function is crucial for effective troubleshooting and maintenance․ Proper operation of the HMU and fuel pump directly impacts the heater’s overall efficiency and longevity, contributing to reliable hot water supply․
HydroMechanical Unit (HMU)
The HydroMechanical Unit (HMU) is a critical component within Honeywell water heater fuel control systems․ It functions as a precise regulator, meticulously controlling the flow of fuel to maintain optimal combustion․ This unit utilizes hydraulic principles to modulate fuel delivery based on heating demand, ensuring efficient operation and minimizing waste․
Proper HMU function is essential for stable flame characteristics and consistent water temperature․ Regular inspection and maintenance of the HMU are vital for preventing malfunctions and ensuring the longevity of the water heater system․
Fuel Pump Operation
The fuel pump is a vital element in Honeywell water heater systems, responsible for delivering fuel from the supply source to the burner․ Its operation is directly governed by the control board, activating when a heating demand is detected․ The pump maintains consistent fuel pressure, ensuring reliable ignition and stable combustion․
Monitoring the fuel pump’s performance is crucial; unusual noises or inconsistent fuel delivery can indicate a malfunction․ Regular checks and timely replacement of a failing pump are essential for safe and efficient water heating․
User Manual Importance & General Instructions
This Honeywell water heater control manual is paramount for safe and effective operation․ Carefully reading all instructions before use is critical, ensuring proper installation, maintenance, and troubleshooting․ Ignoring these guidelines could lead to system malfunction, potential hazards, or voided warranties․
General instructions emphasize the importance of qualified personnel for repairs, adherence to safety precautions, and regular preventative maintenance․ Always disconnect power before servicing and follow all local codes and regulations․ Proper understanding guarantees optimal performance․
Specific Model Differences & Compatibility
Honeywell water heater controls exhibit variations across models like WV8840A1000, WV8840B1109, and WV8840B1158․ These differences impact repair kits and wiring configurations; therefore, precise model identification is crucial․ Compatibility extends beyond Honeywell units, supporting brands like Bradford White, A․O․ Smith, and Rheem․
The Python library facilitates communication with diverse tank brands via RS485 Modbus․ Understanding these nuances ensures correct component selection and seamless integration․ Always verify compatibility before attempting repairs or upgrades to avoid operational issues․
Finding Replacement Parts
Sourcing replacement parts for Honeywell water heater controls requires careful attention to model numbers․ Kits like the Wsensor Repair Kit (WV8840B1109) and specific gas valve boards (WV8840A1000, WV8840B1158) are readily available online through various suppliers․
Ensure the part precisely matches your unit to guarantee compatibility and functionality․ Online marketplaces and dedicated HVAC parts retailers are excellent resources․ Always prioritize genuine Honeywell parts for optimal performance and safety, avoiding potential issues with third-party alternatives․
Warranty Information & Support
Honeywell provides warranties on its water heater control components, varying by product and region․ Review your original purchase documentation for specific terms and conditions regarding coverage duration and limitations․
For warranty claims or technical support, contact Honeywell’s customer service department directly through their official website or designated phone lines․ Detailed contact information is typically available in the product manual․ Retain proof of purchase for streamlined warranty processing․ Accessing online resources and FAQs can also resolve common issues quickly․
Preventative Maintenance Schedule
Regular maintenance extends the lifespan of your Honeywell water heater control system․ Annually, inspect wiring connections for corrosion and tightness, ensuring secure operation․ Clean the exterior to prevent dust buildup, impacting ventilation․
Every six months, visually check for leaks around the gas valve and connections․ Periodically test safety features like the high-limit switch․ Following these steps, alongside professional inspections every few years, minimizes potential issues and maintains optimal performance․ Document all maintenance for warranty purposes․
Disposal and Recycling Guidelines
Responsible disposal of your Honeywell water heater control components is crucial for environmental protection․ Do not discard electronic boards or gas valves with regular waste․ Contact local recycling centers or waste management facilities for proper e-waste handling procedures․
Some components may contain hazardous materials requiring specialized disposal․ Check local regulations for specific guidelines․ Consider donating working parts for reuse․ Prioritize environmentally sound practices when decommissioning your system, minimizing landfill impact and promoting resource recovery․