
Kemper Profiler Player Manual: A Comprehensive Guide
Welcome! This manual details everything needed to master the Kemper Profiler Player, unlocking its vast tonal potential for studio and stage performance․
The Kemper Profiler Player represents a revolutionary approach to guitar amplification and effects processing․ Unlike traditional modeling, the Kemper doesn’t simply simulate amps; it captures their complete sonic fingerprint – the amplifier, cabinet, speaker, and even the microphone used in the recording process․
This technology, known as Profiling, allows you to recreate the tones of your favorite amps with incredible accuracy, and then manipulate those tones in ways never before possible․ The Profiler Player offers access to a massive online library of user-created profiles, expanding your tonal palette exponentially․
Beyond profiling, the Kemper is a powerful effects unit, offering a comprehensive suite of studio-grade effects․ It’s designed for both live performance and studio recording, providing a consistent and reliable platform for your sound․ This manual will guide you through every aspect of the Profiler Player, from initial setup to advanced editing techniques, helping you harness its full potential․
Unboxing and Initial Setup
Carefully unpack your Kemper Profiler Player and verify all components are present (see “Package Contents”)․ Before connecting power, visually inspect the unit for any signs of shipping damage․ Place the Profiler Player on a stable, well-ventilated surface․

Connect the included power adapter to the unit and a suitable power outlet․ Do not use a different power adapter, as this could damage the device․ Once powered on, the Kemper will guide you through a brief initial setup process, including language selection and time zone configuration․
Next, connect your guitar to the input jack and your amplifier or audio interface to the output jack․ It’s recommended to start with a basic connection to familiarize yourself with the unit’s core functionality before exploring more complex setups․ Ensure all cables are securely connected to avoid signal interruptions․
Package Contents
Your Kemper Profiler Player package should include the following items․ Please verify that all components are present and undamaged․ If anything is missing or appears faulty, contact your retailer or Kemper support immediately․
- Kemper Profiler Player Unit: The core of your tonal journey․
- Power Adapter: Specifically designed for the Profiler Player (voltage and amperage details printed on the adapter)․
- USB Cable: For firmware updates, Rig transfers, and connection to a computer․
- Quickstart Guide: A simplified guide to get you started quickly․
- Safety Information Booklet: Important safety precautions and regulatory information․
Optional accessories, sold separately, include an expression pedal, a flight case, and various connectivity cables․ Retain the original packaging for potential future transport or warranty claims․
Connecting Power and Audio
Powering Up: Connect the provided power adapter to the DC IN jack on the rear panel of the Kemper Profiler Player․ Ensure the voltage matches your local power supply․ Plug the adapter into a grounded outlet․ The unit will power on automatically․
Audio Outputs: The Profiler Player offers multiple audio outputs․ Connect your amplifier’s input using the ¼” MAIN OUT (L/Mono and R) jacks․ For direct recording, connect the outputs to your audio interface․ Use balanced XLR outputs for optimal signal quality and noise reduction when connecting to a mixing console․
Input: Connect your guitar or bass to the INPUT jack․ Always use a high-quality instrument cable․ Caution: Never connect the Profiler Player’s outputs directly to another guitar input – this can cause damage!
Understanding the Kemper Interface
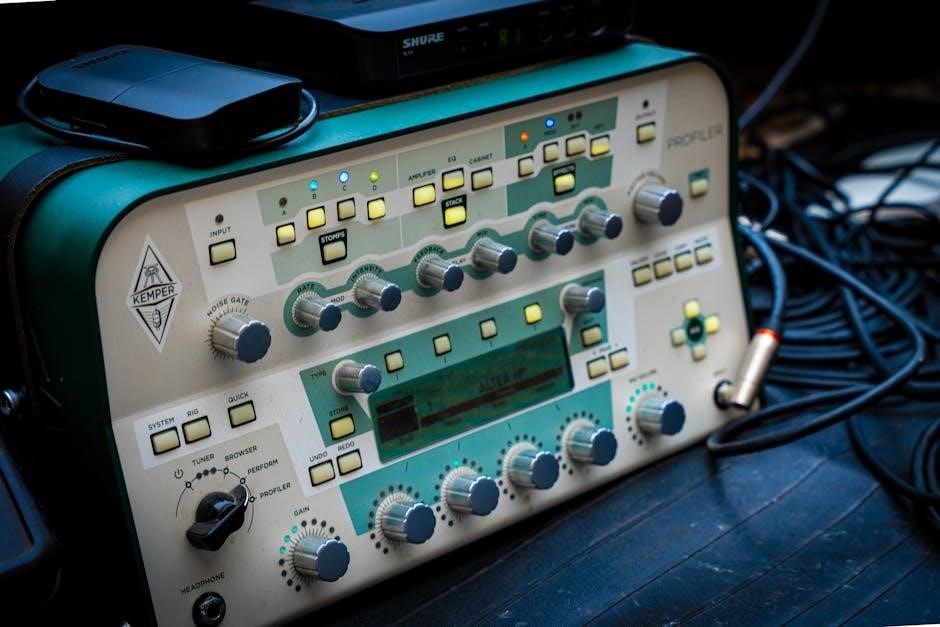
Navigating the System: The Kemper Profiler Player’s interface is designed for intuitive operation․ The large color display provides clear visual feedback, showing rig parameters, profiling information, and system settings․ The central encoder knob is your primary tool for navigating menus and adjusting values․
Performance View: This is your main playing screen, displaying the currently selected rig and providing access to essential controls like volume, wah, and modulation․
Rig View: Access detailed editing parameters for the selected rig․ Here you can modify amplifier settings, cabinet simulations, and effects․
Global Settings: Configure system-wide settings like input/output levels, MIDI settings, and display brightness․ Familiarize yourself with these sections to customize the Profiler Player to your preferences․
The Main Screen Layout
Display Overview: The Kemper’s main screen is logically divided into sections․ Across the top, you’ll find the current Rig name, Performance name, and key system indicators like input level and tuner status․ Below this is the central parameter display, which dynamically changes based on the selected view․
Parameter Area: This area shows the currently selected parameter for adjustment, along with its value․ Use the encoder knob to modify these settings․ The screen also displays graphical representations of certain parameters, like EQ curves․
Navigation Bar: Located at the bottom of the screen, the navigation bar provides quick access to the main sections: Performance, Rig, and Global settings․ Dedicated buttons allow for swift switching between these areas․
Contextual Buttons: Surrounding the parameter area are contextual buttons that change function depending on the current view, offering shortcuts to common operations․
Knobs, Switches, and Buttons Explained
The Encoder Knob: This is your primary control for adjusting parameters․ Rotate it to change values, and press it to select or confirm changes․ Its function adapts to the current screen context․
Performance Buttons (1-8): These buttons activate assigned Performances, allowing for instant access to complete sound setups․ They can be customized within the Performance mode․
Rig Buttons (1-8): These buttons select Rigs within a Performance․ They are crucial for switching between different amp profiles and tones during play․
Home/Menu Button: Pressing this button returns you to the main menu, providing access to global settings and other core functions․ It’s your gateway to the Kemper’s deeper features․
Shift Button: Holding Shift while pressing other buttons unlocks secondary functions, expanding the Kemper’s control options․ Explore these combinations!
Profiling: Capturing the Sound of Your Amp
What sets the Kemper apart is its Profiling capability․ This revolutionary technology allows you to digitally recreate the sonic fingerprint of your existing guitar amplifiers, cabinets, and even effects pedals․
Profiling isn’t simply an impulse response; it’s a comprehensive capture of the entire amplifier’s behavior, including its power supply response, tube sag, and component interactions․ The result is an incredibly accurate and dynamic digital representation․
This process involves connecting your amplifier to the Kemper Profiler Player and using the unit to analyze and store its unique characteristics․ You can then use these “Profiles” to play through your favorite amps without the need for the physical hardware․
Profiling opens up a world of tonal possibilities, allowing you to preserve, share, and experiment with a vast library of sounds․
What is Profiling?
Profiling, at its core, is the process of capturing the complete sonic signature of a guitar amplifier․ It goes far beyond simply recording the sound; it analyzes and recreates the amplifier’s dynamic response, harmonic content, and unique tonal characteristics․
Think of it as creating a digital “snapshot” of your amp, preserving everything that makes it sound the way it does – from the subtle nuances of tube saturation to the complex interactions within its circuitry․
The Kemper achieves this by sending a precisely engineered sweep signal through the amplifier and meticulously analyzing the resulting output․ This data is then used to build a detailed mathematical model, effectively replicating the amp’s behavior․
The resulting Profile isn’t just a static sound; it’s a living, breathing digital representation of your amplifier, responding to your playing dynamics just like the original․
The Profiling Process – Step-by-Step
Let’s walk through profiling an amplifier․ First, connect your amp to the Kemper’s Profiling Input․ Ensure proper impedance matching for optimal results – typically 4×12 or 8×12 settings․ Next, select an empty Profiling slot․
Navigate to the “Profiling” section on the Kemper’s screen and initiate the profiling process․ The Kemper will send a series of sweeps through your amp․ During this phase, minimize noise and ensure a stable signal․
Once complete, the Kemper displays the Profile․ You’ll be prompted to name and save it․ Fine-tune the profile using the ‘Amp’ and ‘Cabinet’ sections for optimal tone․ Experiment with the ‘Stack’ feature to combine profiles․

Remember, good source tone is crucial! A well-maintained amp yields the best profiles․ Regularly check and adjust your profiling settings for consistent results․
Rig Management
Efficient rig organization is key to a streamlined workflow․ The Kemper Profiler Player allows for extensive rig management capabilities․ Rigs are your complete sound setups – amplifier profile, cabinet, effects, and settings․ Saving a rig preserves all these parameters for instant recall․
To save, simply press the ‘Save’ button while in Rig mode․ Give your rig a descriptive name․ Loading rigs is equally straightforward; use the Category and Rig selector knobs to browse and select your desired sound․
Categories are essential for organization․ Create custom categories to group rigs by genre, artist, or purpose․ This makes finding the perfect tone quick and easy during live performance or studio sessions․ Regularly back up your rigs to an external storage device to prevent data loss․
Saving and Loading Rigs
Preserving and recalling your tones is fundamental to the Kemper experience․ Saving a rig captures the current amplifier profile, cabinet simulation, effects chain, and all associated settings․ To save, navigate to Rig mode and press the ‘Save’ button․ A dialog box will appear, prompting you to name your rig and select a category for storage․
Loading rigs is equally simple․ Utilize the large Category and Rig selector knobs on the front panel to browse through your library․ The current rig name and category are displayed on the screen․ Alternatively, you can use the ‘Load’ button to access a more detailed list․
Remember to regularly back up your rigs to a USB drive or computer to safeguard against data loss․ The Kemper Profiler Player offers robust options for importing and exporting rigs, facilitating sharing with other users․
Organizing Rigs with Categories
Effective rig organization is crucial for quick access to desired tones, especially during live performances․ The Kemper Profiler Player allows you to categorize your rigs, creating a structured library․ Categories act as folders, grouping rigs based on genre, artist, or any other logical criteria․
To create a new category, navigate to the ‘Category’ menu via the system settings․ You can name categories descriptively (e․g․, “Clean Jazz,” “High-Gain Rock,” “Ambient Textures”)․ When saving a rig, you’ll be prompted to assign it to an existing category or create a new one;
Browsing rigs becomes significantly easier with well-defined categories․ Use the Category selector knob to quickly jump to the desired tonal palette․ Regularly reviewing and refining your category structure ensures a streamlined workflow and efficient tone retrieval․
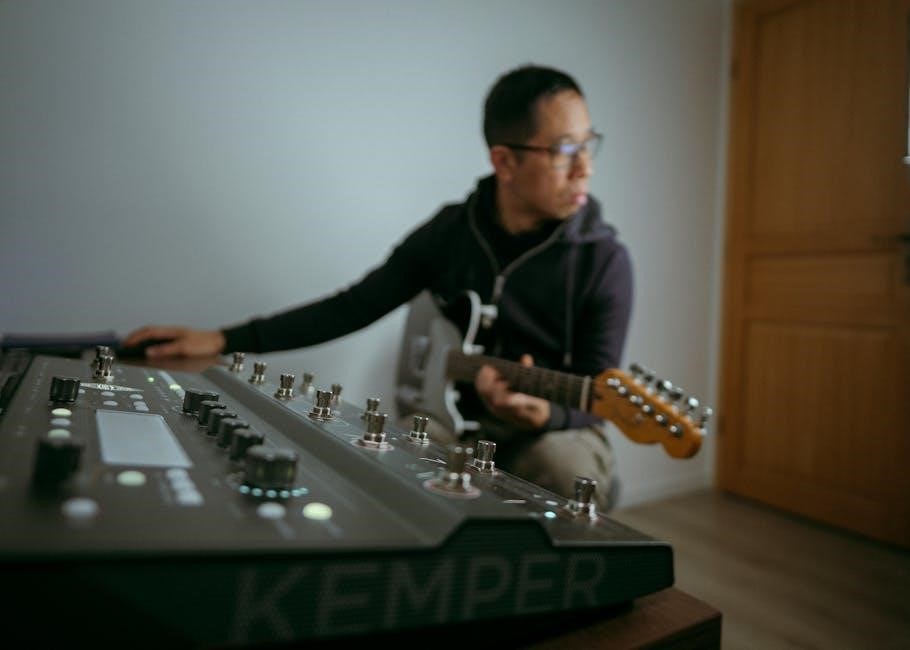
Performance Mode: Playing Live
Performance Mode is designed for seamless transitions between rigs during live performances․ It allows for intuitive control and eliminates unwanted gaps or glitches in your sound․ Access Performance Mode by pressing the ‘Perform’ button․ This displays a setlist view, where you can arrange rigs in the order you intend to play them․
Rigs within a Performance setlist can be activated using the footswitch assigned to ‘Next’ or ‘Previous’ rig․ The ‘Snapshot’ function allows for instant switching between variations within a single rig․ Consider utilizing the ‘Morph’ function for gradual transitions between two rigs, creating dynamic textures․
Experiment with different setlist arrangements and footswitch assignments to find a workflow that suits your playing style․ Remember to save your Performance sets for future use, ensuring consistent and reliable live performances․
Switching Rigs Seamlessly
Achieving smooth transitions between rigs is crucial for a professional live sound․ The Kemper Profiler Player offers several features to minimize audible disruptions during rig changes․ Utilize the ‘Smooth Transition’ setting within the Performance Mode options; this blends the tails of effects and sustains, creating a more fluid experience․
Experiment with the ‘Transition Time’ parameter to adjust the duration of the blend․ Shorter times offer quicker changes, while longer times provide a more gradual fade․ Consider using rigs with similar gain staging to further reduce pops or volume jumps․
Properly configured footswitch assignments are also key․ Assigning ‘Next’ and ‘Previous’ functions to dedicated switches allows for quick and accurate rig selection․ Practice your transitions to develop muscle memory and ensure seamless performance․
Using the Expression Pedal

The expression pedal unlocks dynamic control over your Kemper’s sounds․ It can be assigned to a wide range of parameters, including volume, wah, modulation effects, and even amplifier gain․ Access the ‘Expression Pedal’ assignment menu through the Global Settings․ Here, you can select the parameter you wish to control and define the pedal’s range and polarity․
For wah effects, choose the ‘Wah’ parameter and experiment with different wah models․ To control volume swells, assign the pedal to the ‘Volume’ parameter․ Remember to calibrate the pedal’s range to match your playing style․
Many users assign the expression pedal to multiple parameters simultaneously, creating complex and evolving sounds․ Explore the possibilities and save your custom assignments for easy recall during performances․
Editing Rigs: Shaping Your Tone

Rig editing is where you truly personalize your sounds․ The Kemper Profiler Player offers deep control over every aspect of a rig, from the amplifier section to the cabinet and effects․ Access the Rig Editor by selecting a rig and pressing the ‘Edit’ button․ The interface is divided into sections, each representing a different stage of the signal chain․
Begin by adjusting the amplifier settings – gain, EQ, and bias – to sculpt the core tone․ Then, move on to the cabinet section, where you can choose different cabinet models and microphones․ Experiment with different microphone placements to find the sweet spot․ Finally, dive into the effects section, adding and customizing effects like reverb, delay, and chorus․
Don’t be afraid to experiment! The Kemper allows you to save multiple versions of a rig, so you can always revert to a previous setting․
Amplifier Section Editing
The Amplifier section is the heart of your rig’s tone․ Within this section, you’ll find detailed controls mirroring those of a traditional tube amplifier․ Key parameters include Gain, Master Volume, EQ (Bass, Middle, Treble, Presence), and Bias․ Adjusting the Gain controls the input signal level, influencing distortion and overdrive characteristics․
The EQ section allows precise tonal shaping, boosting or cutting specific frequencies․ Presence adds high-end sparkle, while Bias affects the amplifier’s harmonic content and responsiveness․ Explore the ‘Character’ and ‘Clean’ controls for subtle tonal variations․ The ‘Stack’ feature allows layering of amplifier profiles for complex tones․
Remember that small adjustments can yield significant results․ Use your ears and experiment to find the perfect amplifier settings for your desired sound․ Save frequently!
Cabinet and Effects Editing
Beyond the amplifier, the Cabinet and Effects sections offer extensive tonal sculpting․ The Cabinet section lets you choose from a vast library of impulse responses (IRs), simulating various speaker cabinets and microphones․ Experiment with different IRs to dramatically alter your rig’s sound – from vintage warmth to modern aggression․
The Effects section provides a comprehensive suite of studio-grade effects, including compressors, modulations (chorus, flanger, phaser), delays, reverbs, and more․ Each effect features adjustable parameters for precise control․ Utilize the effect chains to create complex and layered soundscapes․

Pay attention to the effect order, as it significantly impacts the final tone․ Don’t be afraid to experiment with unconventional combinations․ Remember to save your customized cabinet and effect settings alongside your rigs!
Connectivity and External Gear
The Kemper Profiler Player boasts versatile connectivity options for seamless integration with your existing setup․ It features a standard ¼” instrument input and outputs, alongside balanced XLR outputs for direct connection to a mixing console or PA system․ A dedicated headphone output allows for silent practice and monitoring․
Expand your control with the ¼” expression pedal input, enabling real-time parameter adjustments․ The Kemper also supports MIDI In/Out/Thru, facilitating synchronization with other MIDI devices and external controllers․ Utilize the USB port for firmware updates and direct connection to your computer․
Explore the possibilities of using external loopers, switchers, and effects pedals to further enhance your performance․ Remember to consult the Kemper’s manual for specific compatibility information and optimal configuration settings․
MIDI Integration
The Kemper Profiler Player’s robust MIDI implementation unlocks a world of control and creative possibilities․ Through MIDI, you can seamlessly integrate the Kemper with your existing rig, controlling rig changes, parameter adjustments, and more from external MIDI controllers, footboards, or even your DAW․
Configure MIDI mappings within the Kemper’s menu to assign specific MIDI Continuous Controller (CC) messages to various parameters like gain, volume, or effects levels․ MIDI Program Change messages allow for instant rig selection, perfect for live performance scenarios․ The Kemper can also transmit MIDI Clock for synchronization․
Explore advanced features like MIDI Learn, simplifying the assignment process․ Remember to consult the comprehensive MIDI implementation chart in the manual for a complete list of supported MIDI messages and functionalities․
Using External Pedals and Controllers
Expand your control over the Kemper Profiler Player with external pedals and controllers! The Kemper supports a wide range of expression pedals and MIDI footcontrollers, allowing for hands-free parameter manipulation and seamless performance transitions․
Connect expression pedals to the dedicated EXP1 and EXP2 inputs to control wah effects, volume swells, or any assignable parameter․ MIDI footcontrollers offer even greater flexibility, enabling rig switching, bank navigation, and complex parameter changes on the fly․
Configure pedal assignments within the Kemper’s Global Settings, tailoring the response curve and range to your preferences․ Explore options for latching or momentary operation․ Remember to check compatibility and required cabling for your specific pedal or controller model․
Firmware Updates and Support
Keeping your Kemper Profiler Player up-to-date is crucial for optimal performance and access to the latest features․ Regularly check the Kemper website (www․kemperamps․com) for firmware updates, which often include bug fixes, performance enhancements, and new functionalities․
Firmware updates are typically installed via USB using the Kemper Updater application․ Always follow the provided instructions carefully to avoid any potential issues during the update process․ Backing up your rigs before updating is highly recommended․
For comprehensive support, including FAQs, troubleshooting guides, and the official Kemper forum, visit the Kemper website․ The Kemper community is a valuable resource for sharing knowledge and resolving issues․ Kemper also offers direct support options for more complex problems․